


Welcome to the guide on how to set up a Linux server. In this guide, we’ll go through choosing and ordering a package, initializing the server, and connecting to the server with also a remote desktop application.
Choosing the package
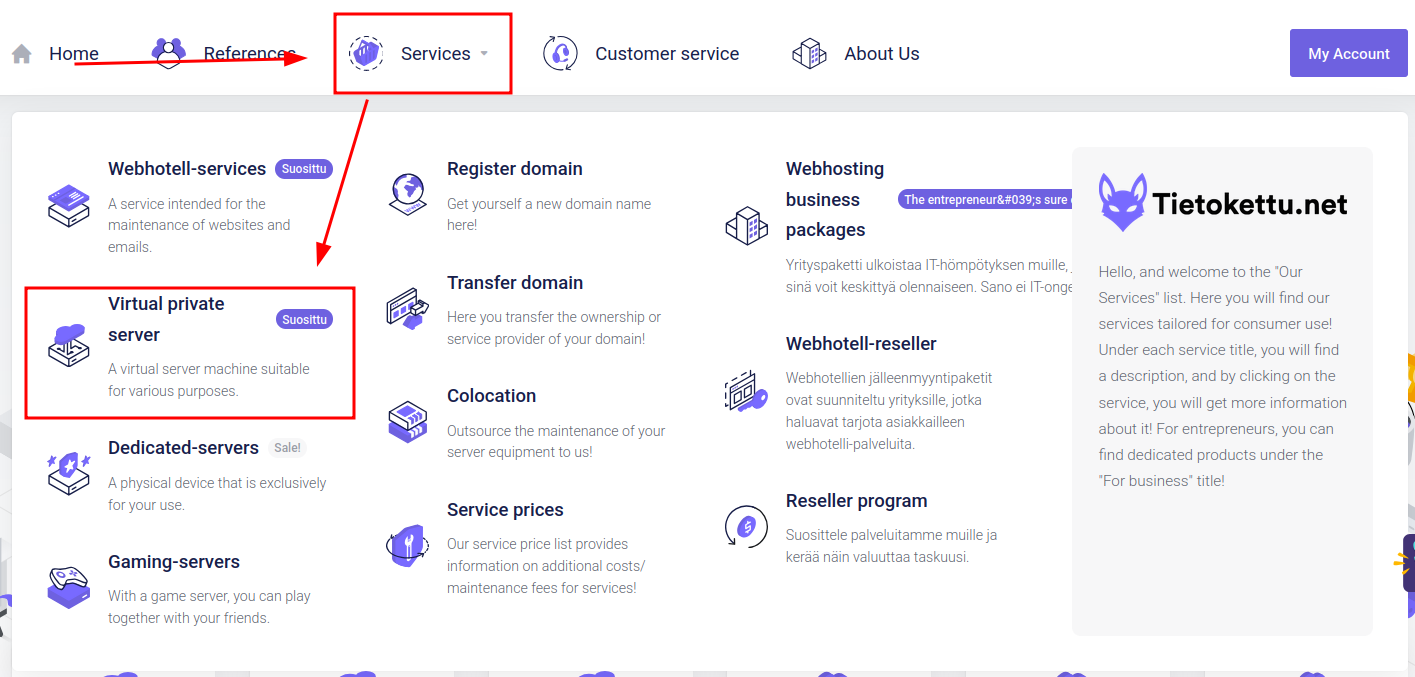
To choose a suitable package, we first need to go to tietokettu.net and from there navigate to our Virtual private servers servers through the "Services" category as shown in the following example image below.
When scrolling down the page, you’ll see all VPS server packages offered by Tietokettu.
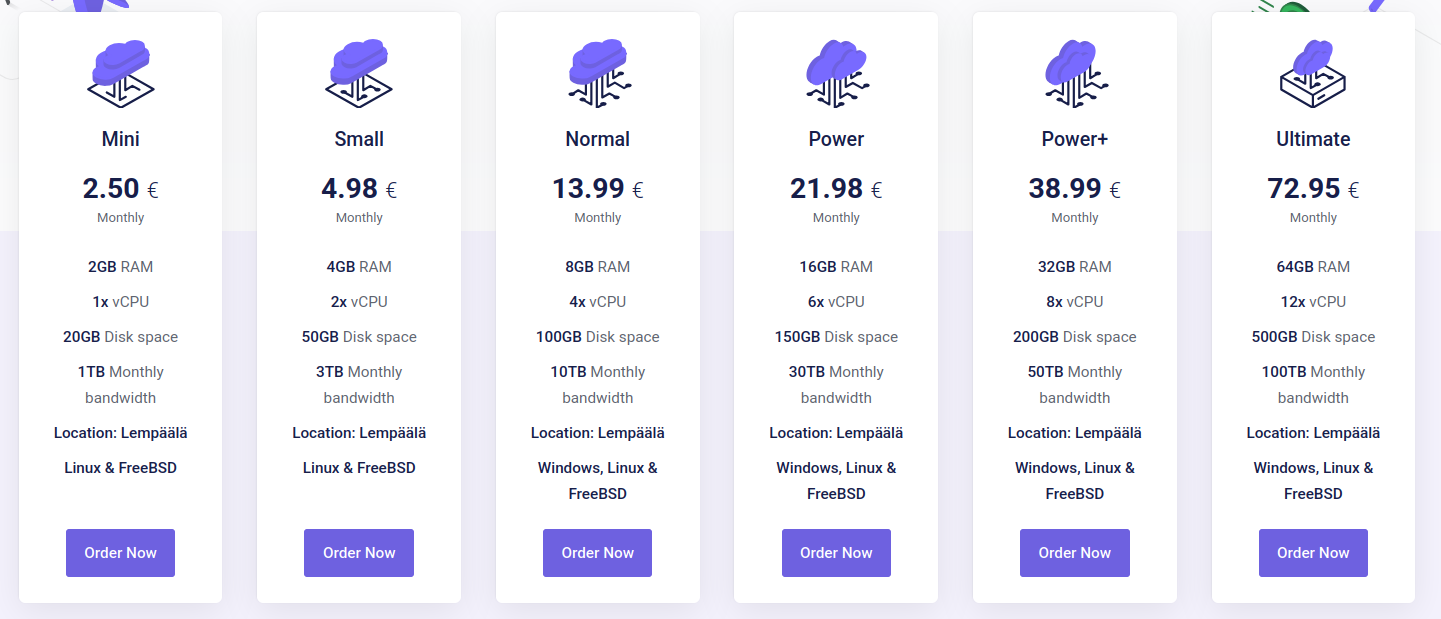
In this list, we can see the specifications, product names and price of the packages. With this information, we can get a first impression of the packages, but for some, this information does not tell the whole story. That's why we've created a list for you where you can see the name of the package and its intended use:
• Mini (€2.50): A very affordable package. Suitable for an email server or a lightweight website. Likely not sufficient for heavier tasks.
• Small (€4.98): A convenient choice for running a small game server or heavier online services like an e-commerce site.
• Normal (€13.99): Adaptable for public game servers or managing larger systems. This and higher-tier packages are sufficient for Windows-based servers.
• Power (€21.98): A solid choice for internal company services. Enough power to run almost anything imaginable.
• Power+ (€38.99): Planning to launch a mega-hit app? This package gives you a powerful environment to support it.
• Ultimate (€72.95): Hosting many game servers? This package includes the resources needed for such operations.
Hopefully, this helps you choose the right package. If you still have questions or can't decide, don't hesitate to contact Tietokettu support.
Placing an order
Once you have decided which package you will take, you can press the "Order now" button at the bottom of that package.
This button will take you to the order settings, where you can edit the details of your product before completing the order. You'll know you're in the right place when your view looks something like the example image below. In this guide, we have the "Small" package as an example, but these instruction apply to every package.
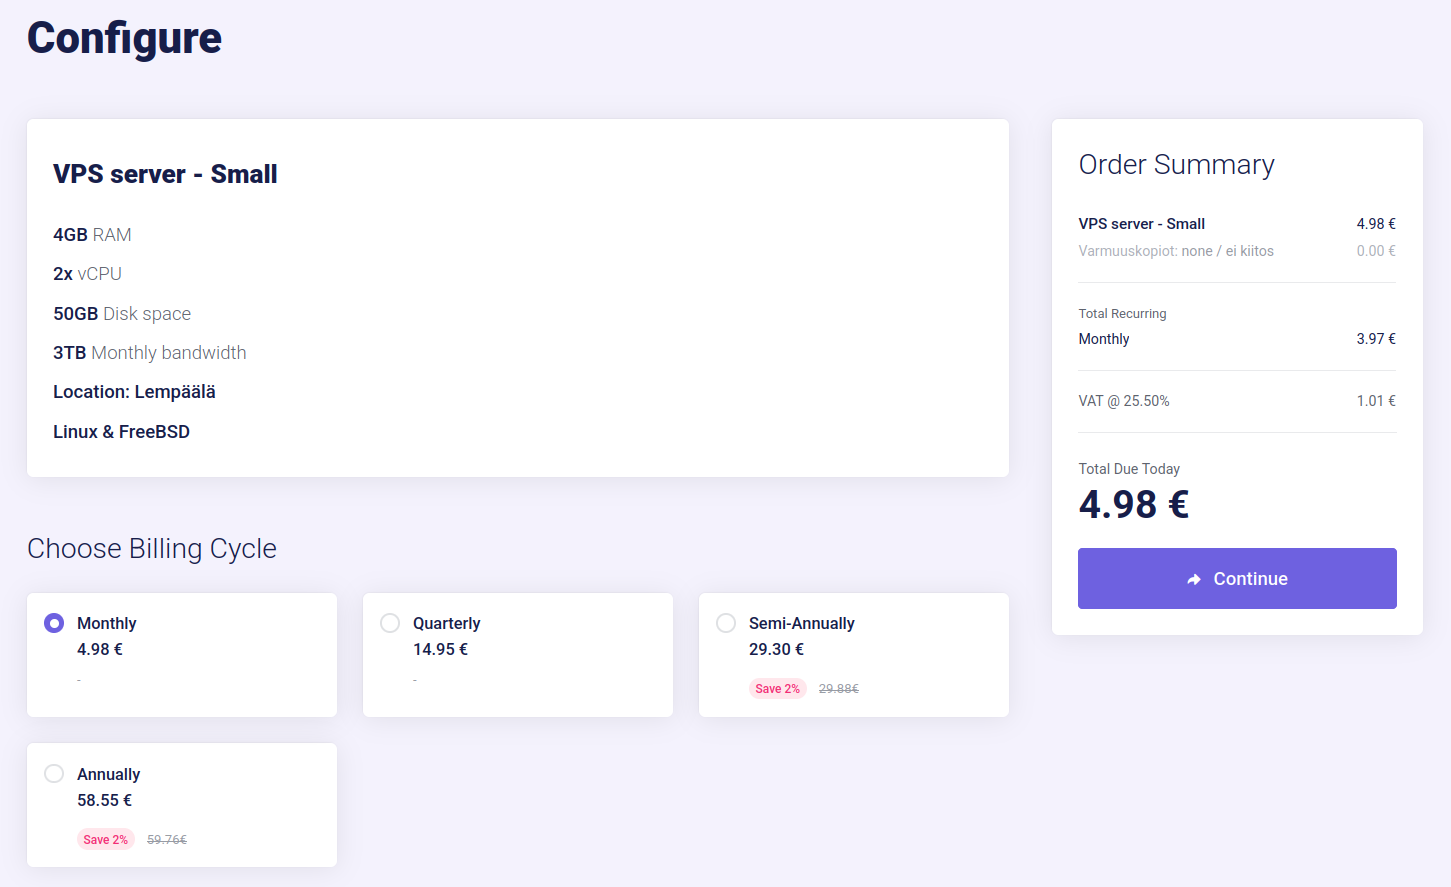
Then we can first choose the billing cycle which means how often you will be billed. The longer the billing cycle you choose, the more money you'll save.
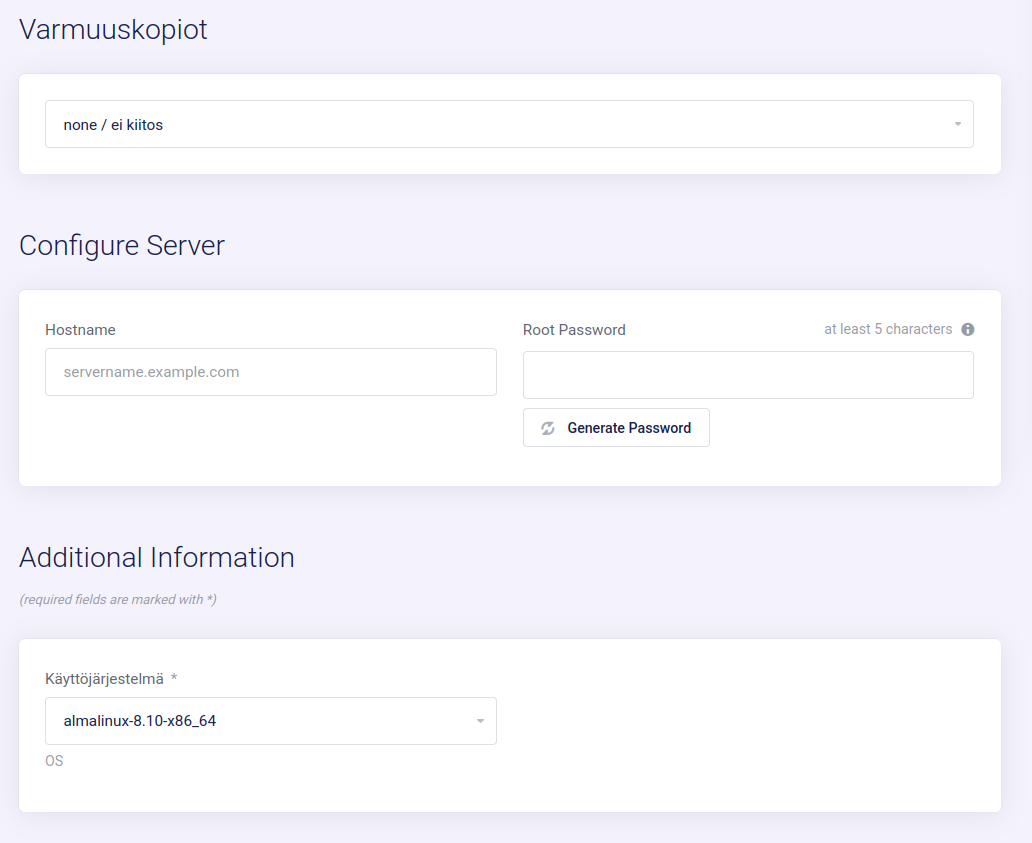
After that, we can edit the product information itself. The first one of these is backups. They help you in critical situations when everything has gone completely wrong and nothing seems to work by restoring everything to the way it was.
Backups restore your VPS server to the state it was in when you last made a backup. However, please note that you will lose all the data you have gained between restoring and taking the backup. Therefore, it is recommended to perform backups as often as possible to have as little data loss as possible.
Next, under processing is the server name and password. The server name is the hostname of the server. If you have your own domain name that you want to point to the server, enter it in that field. Otherwise, enter a name for the server. The password, on the other hand, is the string used to identify yourself to your server with the root user.
The root user has all the permissions on the VPS server, so make your password as secure as possible and don't share it with those who aren't supposed to have access to the server.
Finally, the server operating system would be in line. By clicking on the menu, you will see all the possible options we offer.
If you're looking for an operating system that wasn't on the list, you can install it later from the VPS panel. However, if you would like to install a Windows server, be sure to choose a package that has at least the power of the "Normal" package and follow these instructions.
For new Linux users, we recommend the easy-to-use "Ubuntu" Linux distro.
Example image below shows the configuration section we just discussed.
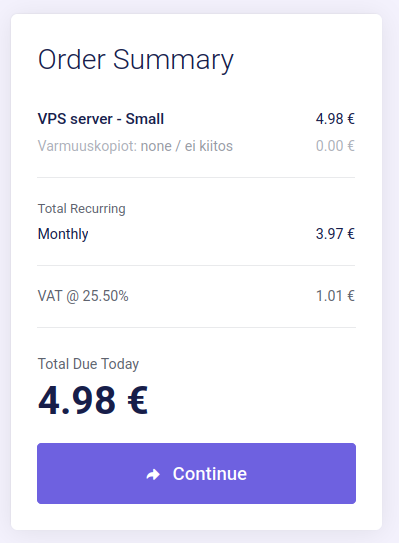
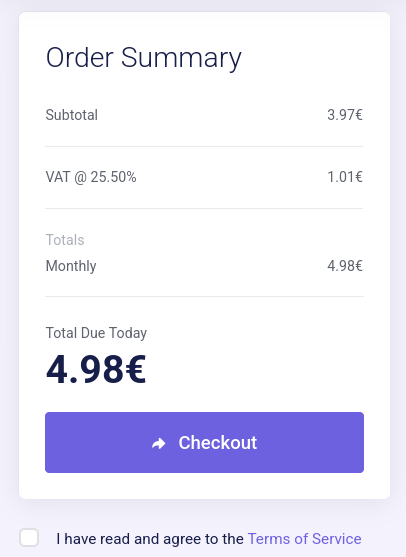
Once you are satisfied with your choices, we can move on to the order summary, where we can see all the information about what you are ordering. At the end of the order summary, there is a button "Continue", from which you can proceed to the shopping cart.
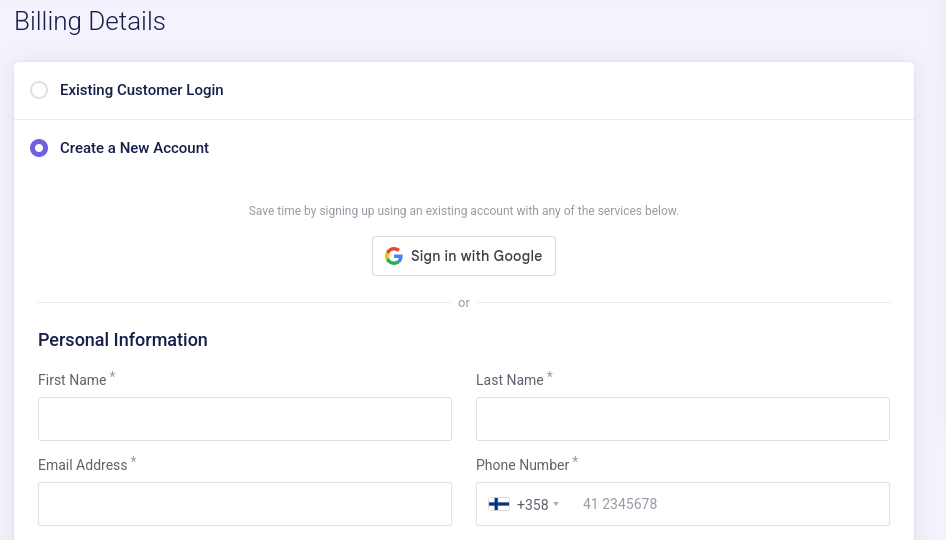
In the shopping cart, you’ll see the products you're ordering and the fields you need or can fill in. These are the following:
a) Promotion code, if you have one.

b) Billing Details. If you're a new customer, choose “Register” and fill in your details.
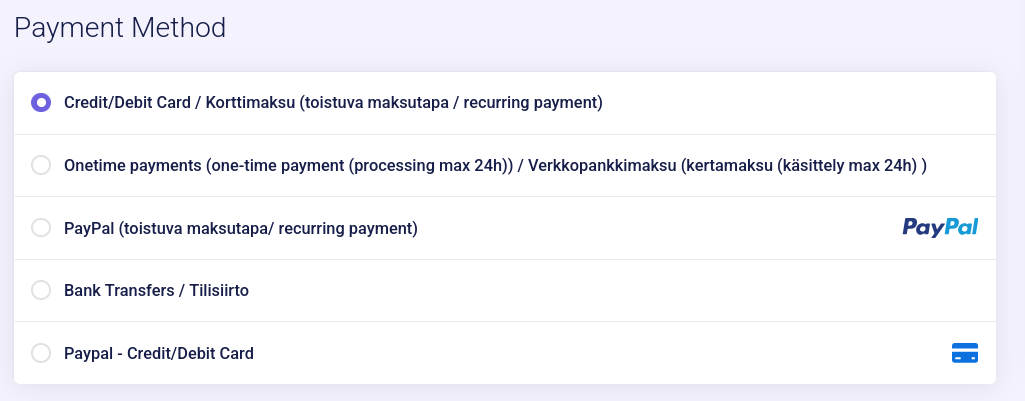
c) Payment Method. Select the payment option that works best for you.
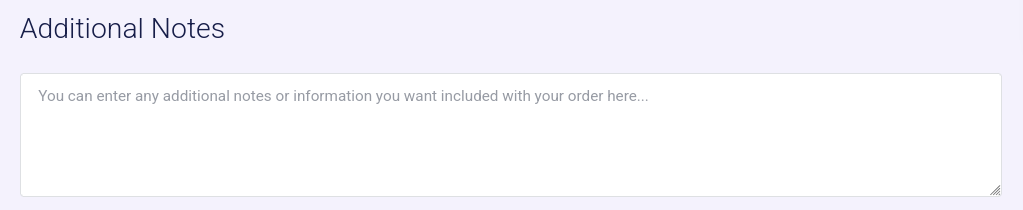
d) Additional Notes, if you want to provide extra details to Tietokettu staff regarding your order.
Finally, click the “Checkout” button at the bottom of the order summary to go to the payment page. Don’t forget to accept the terms of service before completing your payment!
If you still have questions about this step or encounter a problem, do not hesitate to contact Tietokettu support.
Setting up the VPS server
Once your VPS server is acquired, you can begin the setup process. Tietokettu’s VPS servers are easy to use and don’t require much tinkering to get started.
To access the VPS panel, go to tietokettu.net if you're not already there. If not logged in, click the “Login” button in the navigation bar. Otherwise, click on “My Account” or “Client Area” depending on where you are at the site.
In the picture, we show how to get to the customer area when you are not logged in on the website.

In the picture, we show how to access the customer area after logging in to the website.

In the picture, we show how to access the home view of the customer area in the customer area.

From the Client Area, scroll down slightly and choose the services category.
There you will see all your products and services. Select the VPS server you just ordered.
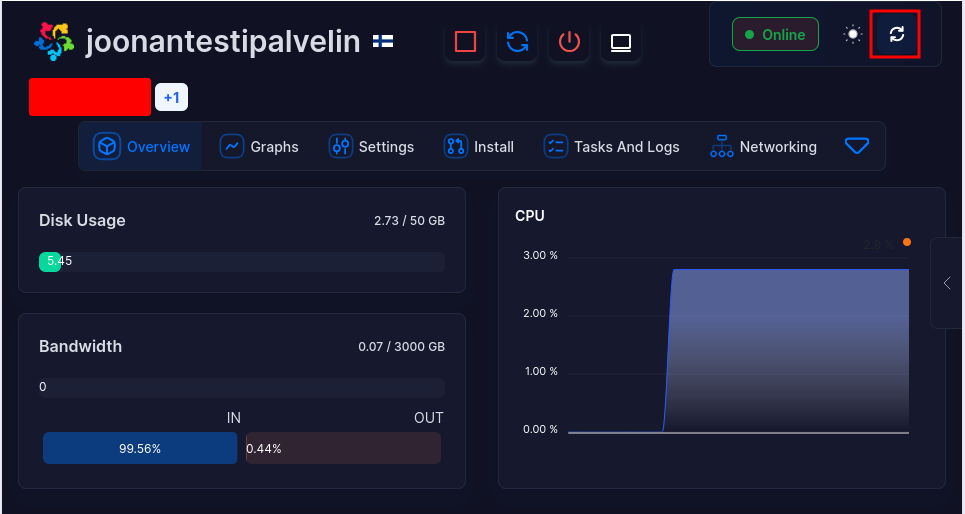
Now you have access to the basic view of the VPS server. Here you can see all the details of your server and you can tinker with your VPS server if you want to.
At the top right, you can see if your VPS server is up and running, and next to it, you can refresh the page information with the latest information from the circle arrow button.
If you still have questions about this step or encounter a problem, do not hesitate to contact Tietokettu support.
Reinstalling the server operating system
If you wish to change your VPS's operating system, go to the "Install -> Reinstall OS" tab in the VPS management panel. Once you’re on a page similar to the example image below, you can choose the OS to install.
After choosing the desired OS from the list, click the “SELECT VERSION” dropdown to view the supported versions. Pick the one you like and scroll down.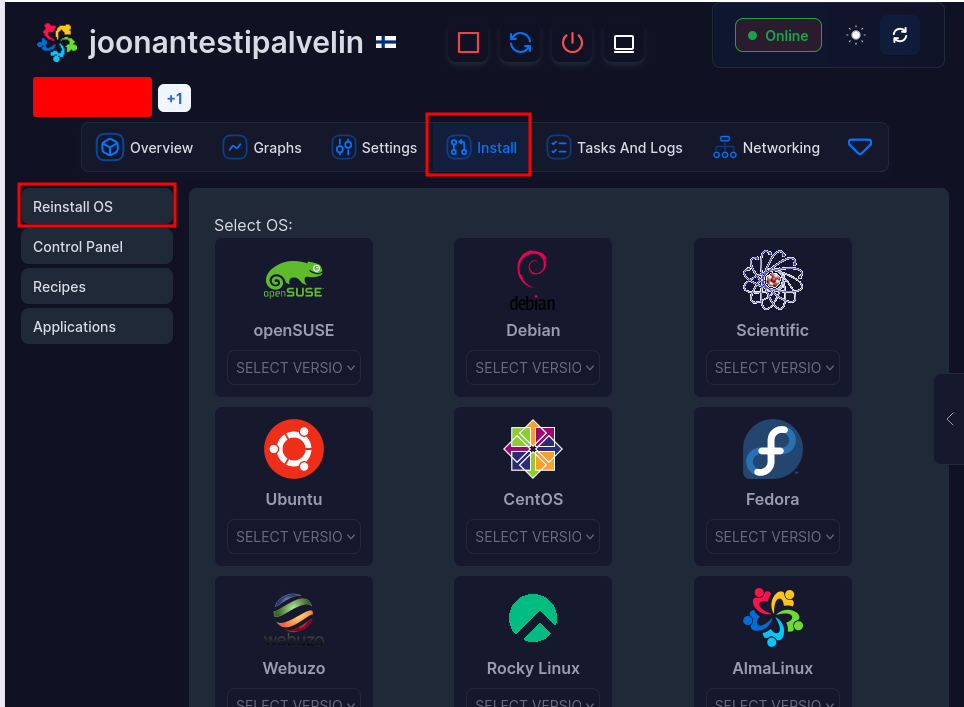
At the bottom of the page, you’ll find fields for the root password for the new installation. On the right side of the first password field you will find a key looking icon which can generate a strong password for your server.
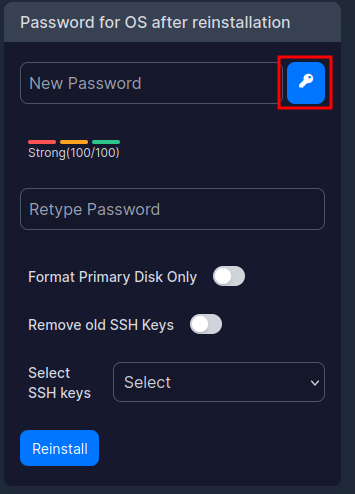
After that, a new window should appear with your new password. You'll now be able to copy the password and store it in a safe place (for example, a password manager app).
Once you have saved the password, you can press the "Ok" button to exit the window.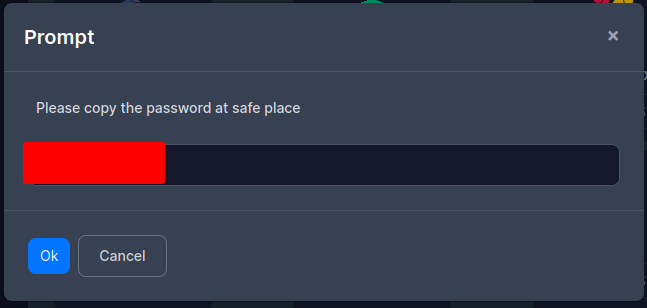
Paste the password into "New Password" and "Retype Password" if the panel didn't do it automatically. You will now be able to choose whether you want to add SSH keys or remove old SSH keys from the server.
After all this, you can press the "Reinstall" button. After a while, your server should be available with the new operating system.
Important to note after reinstalling the operating system!
You may have to work extra to connect to the server if you encounter the following error when connecting to the server. (The next step has instructions on how to connect to the server)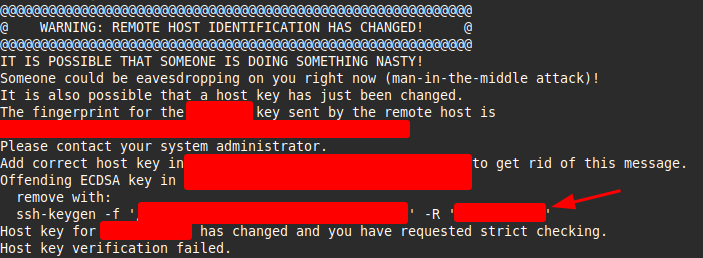
What you need to do to resolve this issue is to copy the line that the arrow points to. Then, simply paste it into the command prompt in the terminal and press the enter key. Now you should be able to connect to the server normally.
If you still have questions about this step or encounter a problem, do not hesitate to contact Tietokettu support.
Connecting to the VPS server
After all this, you will surely want to connect to a VPS server. This is easily done in two ways, which are Putty and SSH connection. In this guide, we will go through one of them which is connecting with Putty.
Putty works on Windows and Linux.
First, we need to install Putty if it doesn't already exist. You can install the Putty app directly from the author's website or from the Microsoft Store.
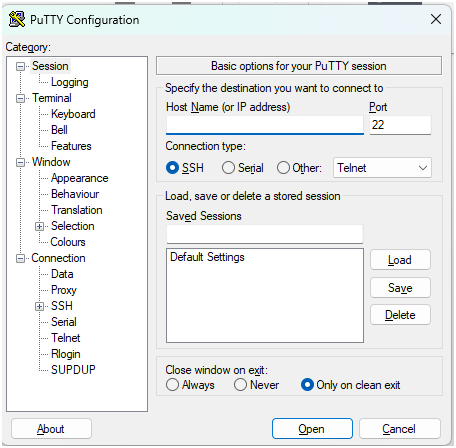
Next, launch Putty by pressing the search box on your computer and typing Putty. Then open an app called Putty or Putty.exe. Now it should look like this:
Next, enter your server's IP address in the text line indicated by the arrow below (you can get all the information about the VPS server in the panel or in the order confirmation email!):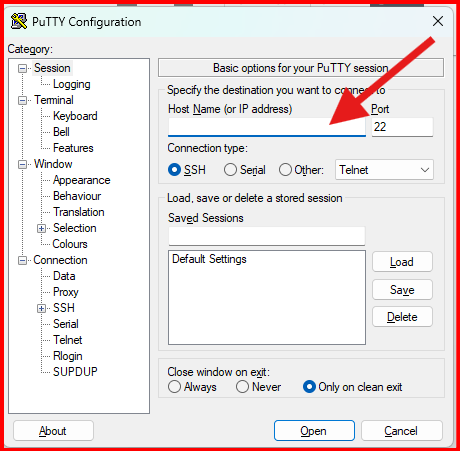
Then, after entering the server's IP address, you can press the "Open" button to open the SSH connection. After we have opened the SSH connection, we must enter the username we want to log in. By default, this username is root, so we'll write root in the example image below.
Finally, we need to enter the root password for the VPS server, which you have set when you reinstalled or ordered the VPS server.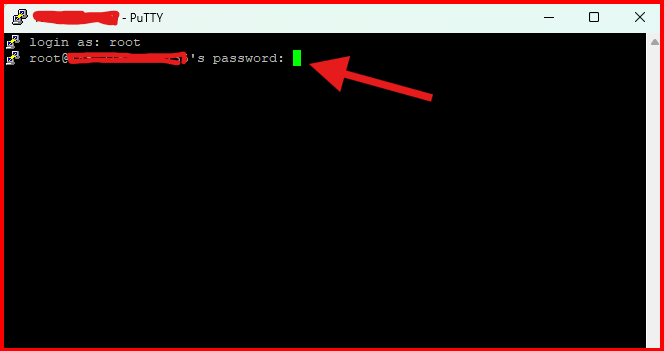
Great job if you got in! Now in Putty it should look like this: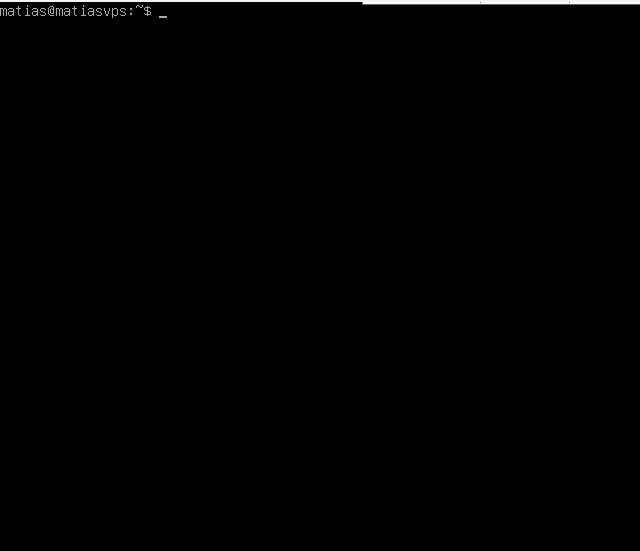
If you still have questions about this step or encounter a problem, do not hesitate to contact Tietokettu support.
Remote Desktop Connection
With a remote desktop connection, you can easily edit things with a graphical view. To be able to connect to Remote Desktop, you need to install the necessary protocol, which is different depending on your operating system. Therefore, the following you will see a list of instructions that are intended for their own operating systems.
At the end of them, there are also instructions on how to connect to a VPS server using remote desktop software. These instructions are usually made from the perspective of the Windows operating system. So in that case you are using Linux and need to connect to Remote Desktop, follow this guide.
-
Remote Desktop on Ubuntu (includes KDE Plasma installation): here
-
Remote Desktop on Alma Linux: here
-
Remote Desktop on Rocky Linux: here
Thank you so much for reading this guide! If this guide helped you with using a Linux server on Tietokettu, consider giving this guide a thumbs up. If you have encountered a problem, do not hesitate to contact Tietokettu support.


