How to set up a cPanel calendar in Thunderbird.
1. Log in to cPanel:

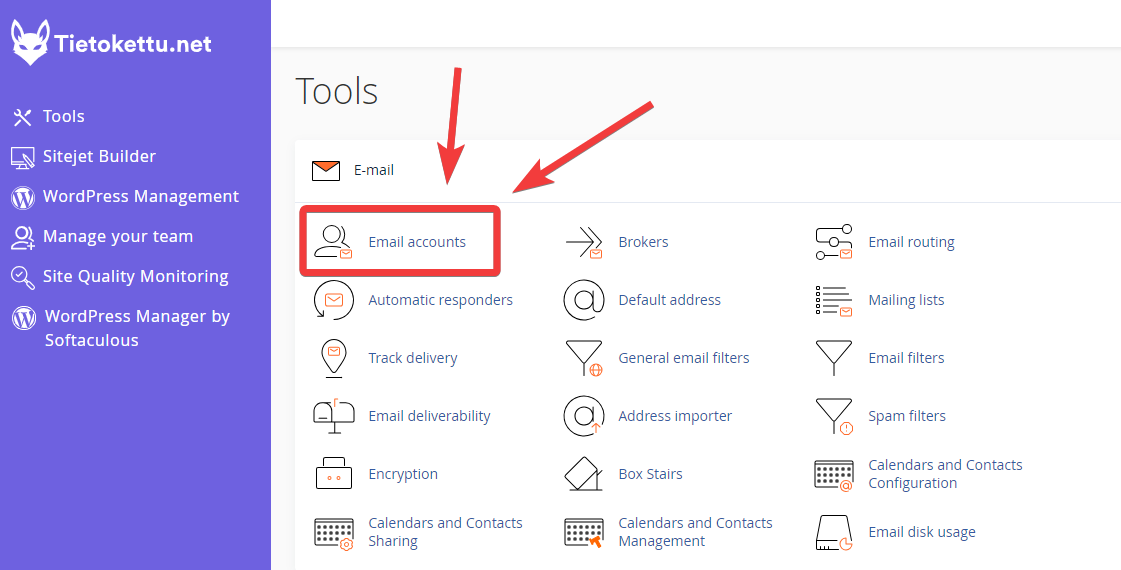
2. Locate and open "Email Accounts."
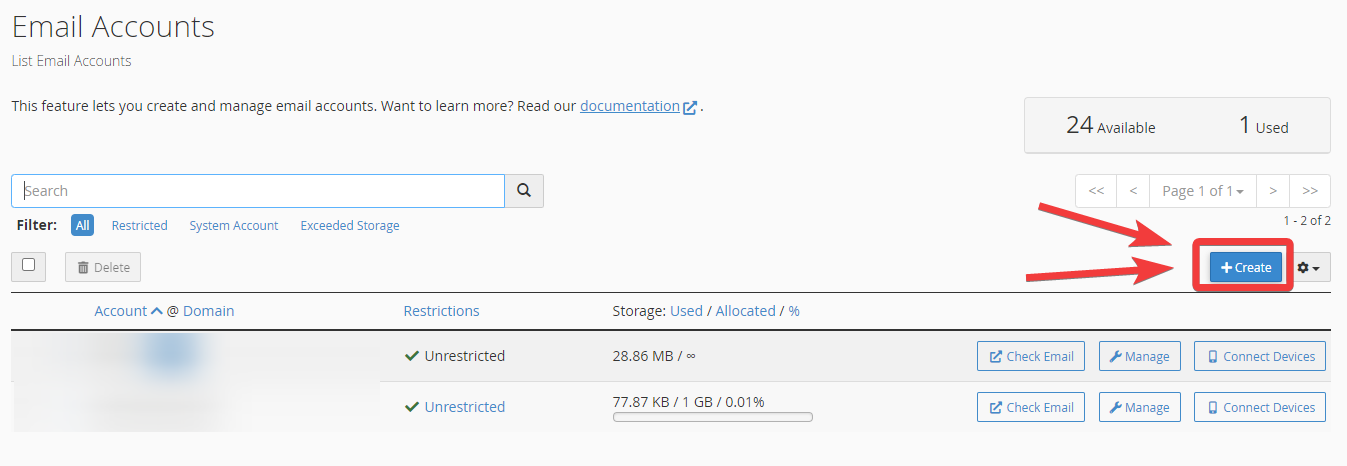
3. If you don't already have an email account, click "Create" on the right. If you already have an email account, skip to step 5.
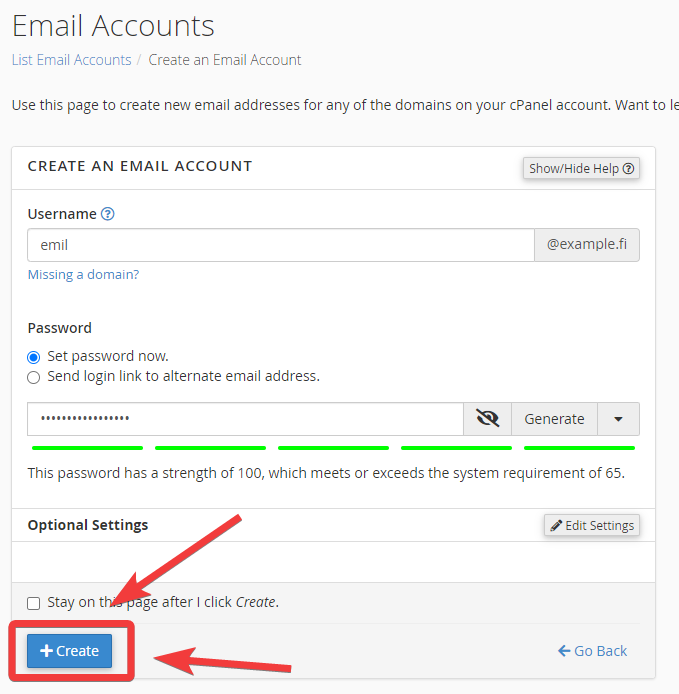
4. Create a username and password. Then click "Create" at the bottom.
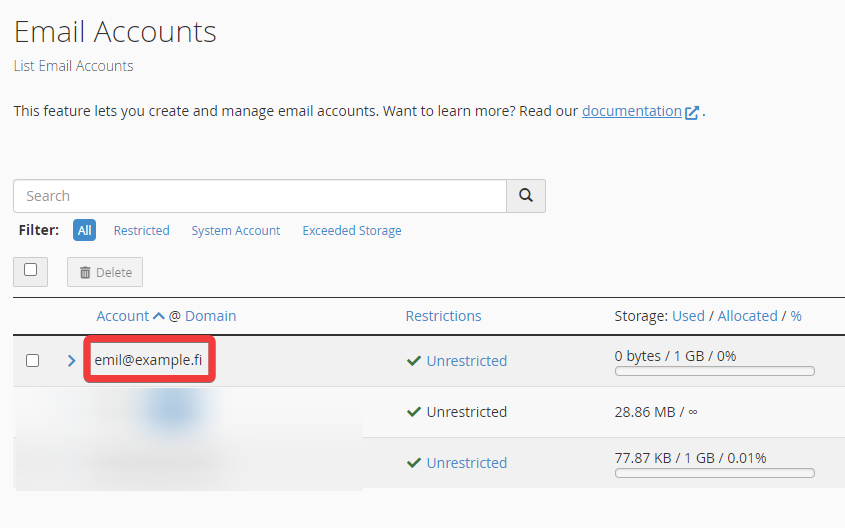
5. Write down the email address you just created.
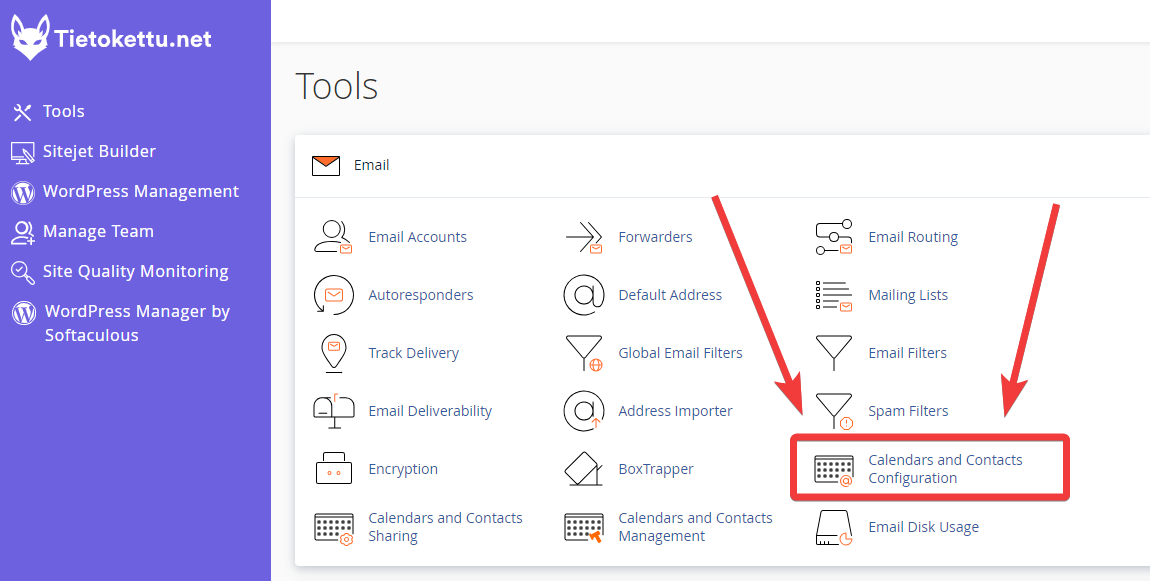
6. Return to the main page. Find and open "Calendars and Contacts Configuration."
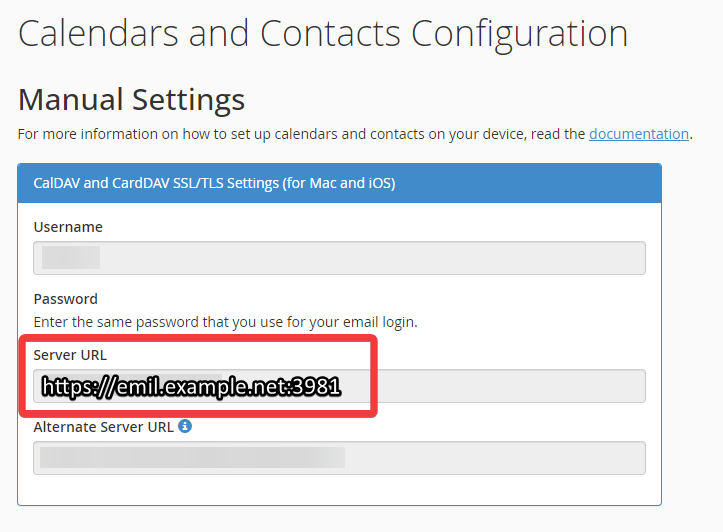
7. On this page, locate the section titled "Calendars and Contacts Configuration." Write down the "Server URL."
8. Open Thunderbird. If you don’t have Thunderbird, you can download it here.
9. In Thunderbird, find the calendar icon in the left-hand menu and click on it.

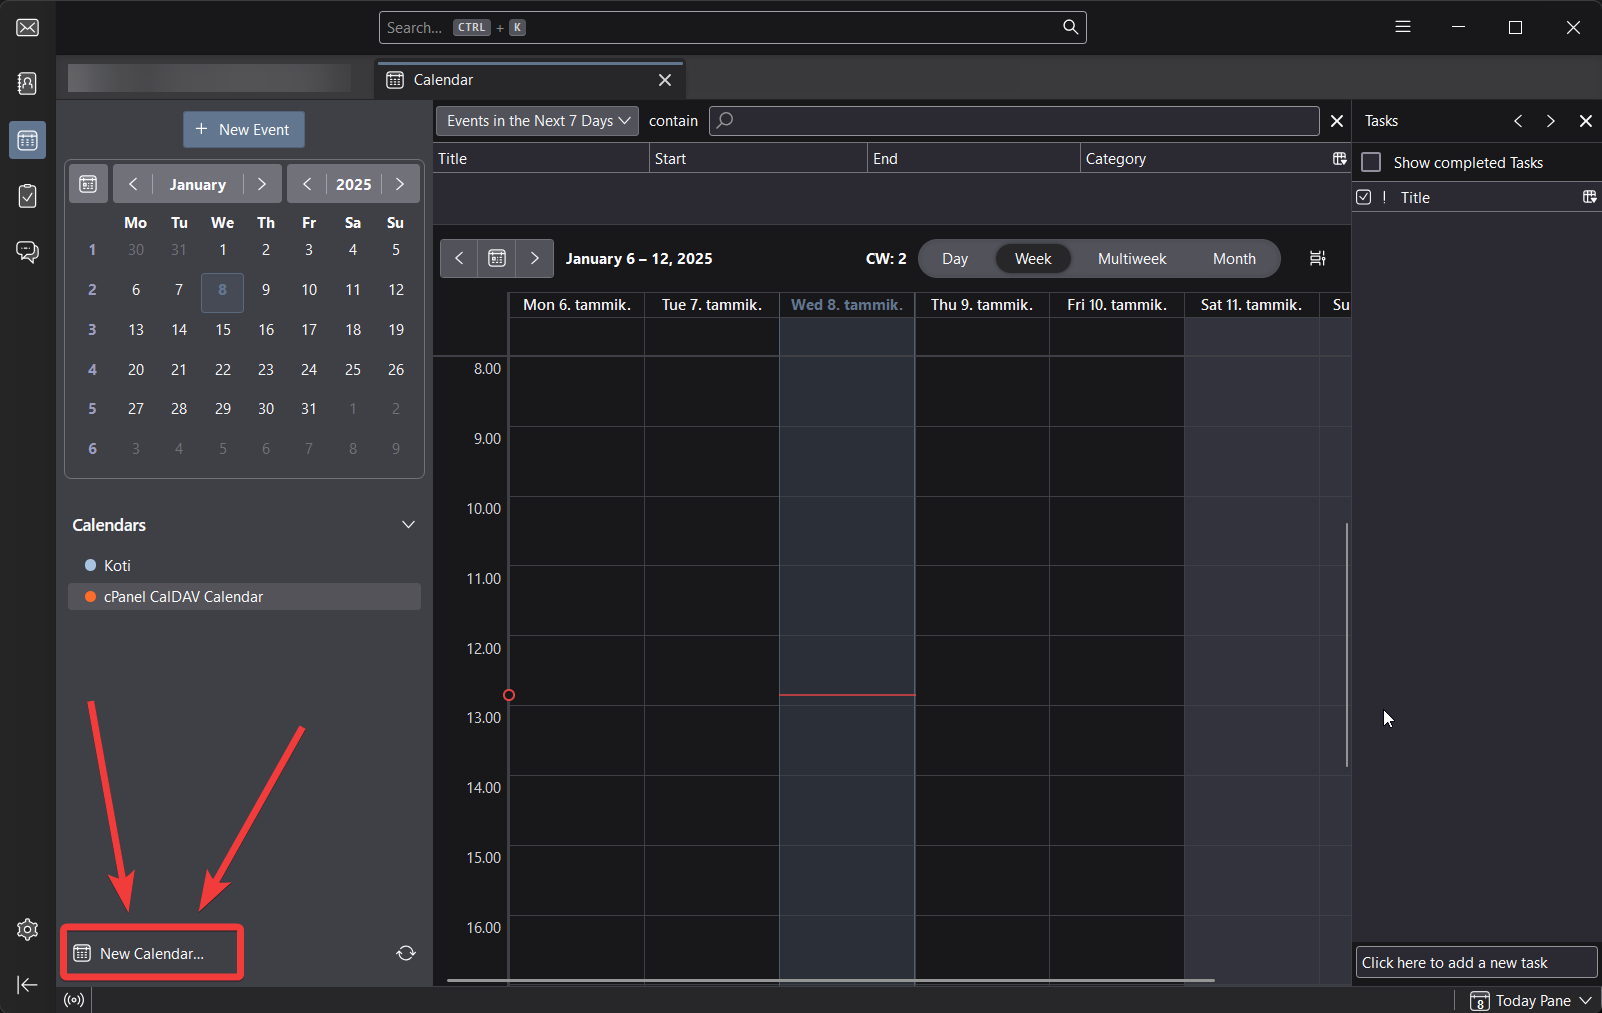
10. Next, click "New Calendar…" at the bottom left of the program.
11. When a new window opens, select "On the Network" and then click "Next."

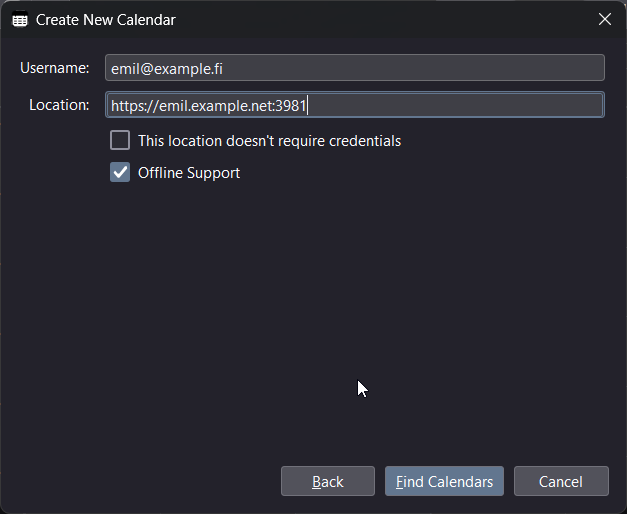
12. Enter the username and URL you noted earlier, as shown in the example, and click "Find Calendars."
13. The program will now ask if you want to use "CalDAV" or "iCalendar." Simply click "Subscribe" at the bottom.
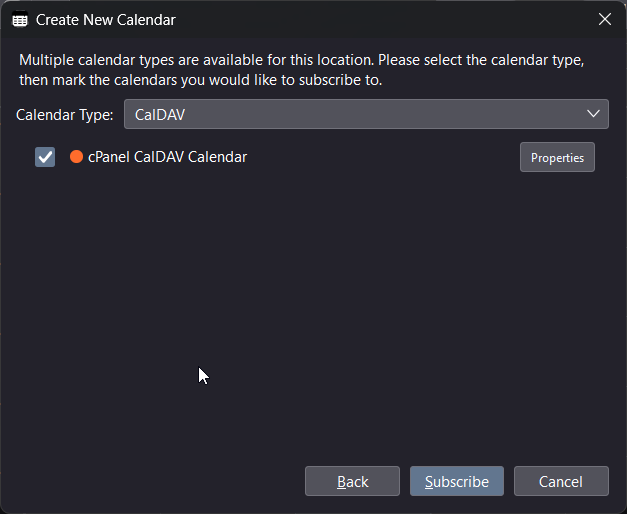
14. Congratulations! You can now use your cPanel calendar in Thunderbird.


