


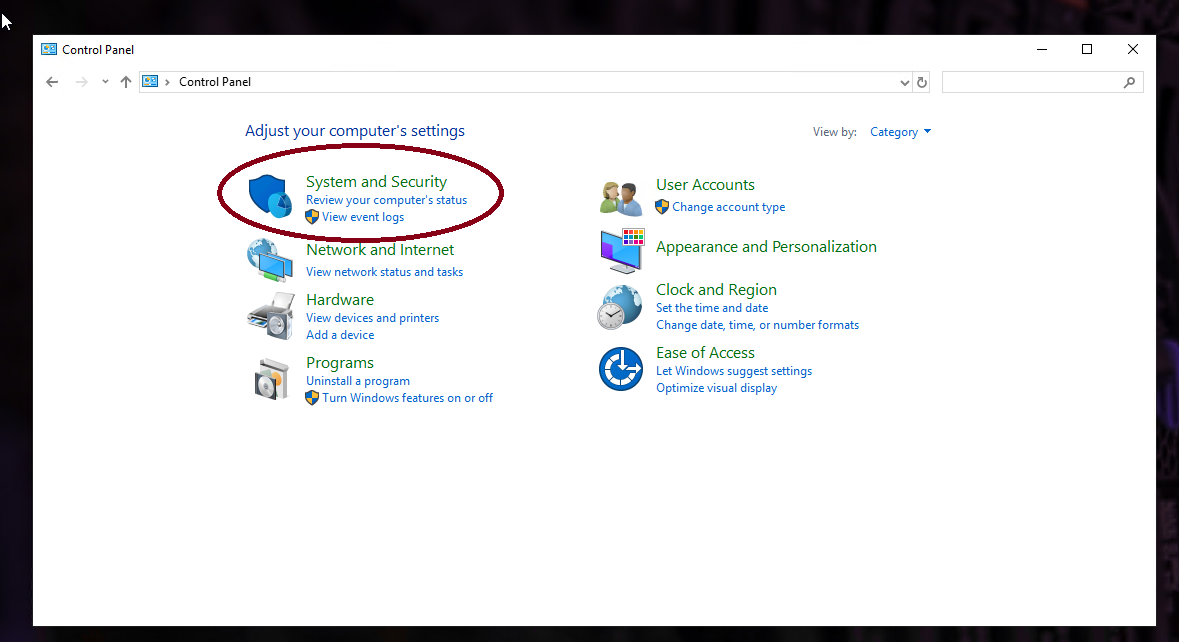
1. First open control panel and click "System and Security".
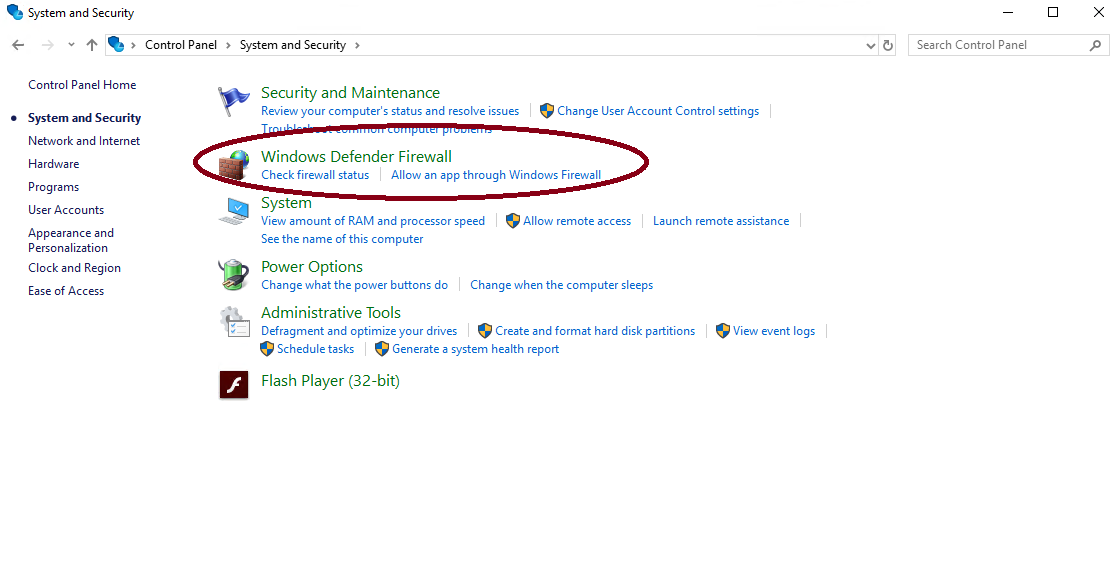
2. Then click "Windows Defender Firewall".
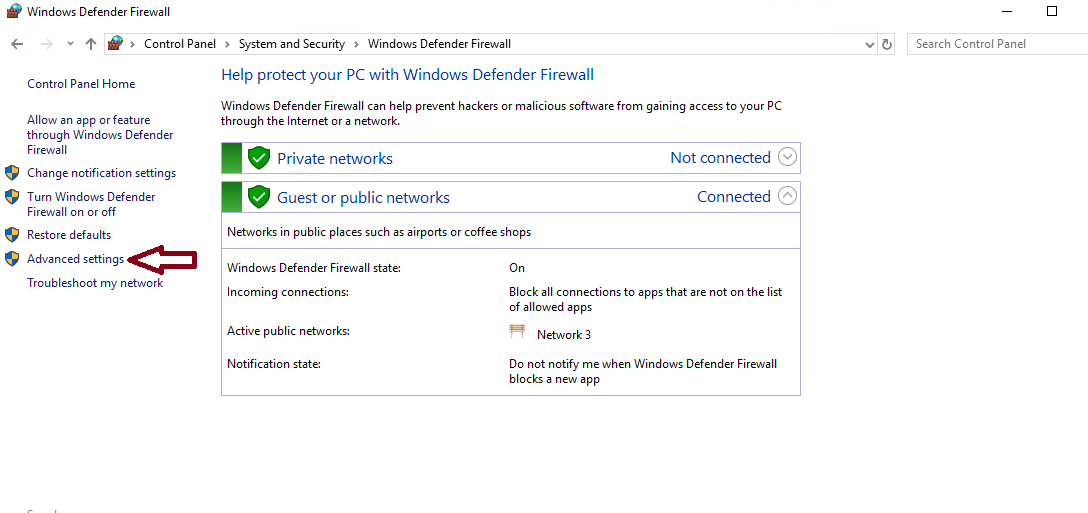
3. Then click "Advanced settings" from the left.
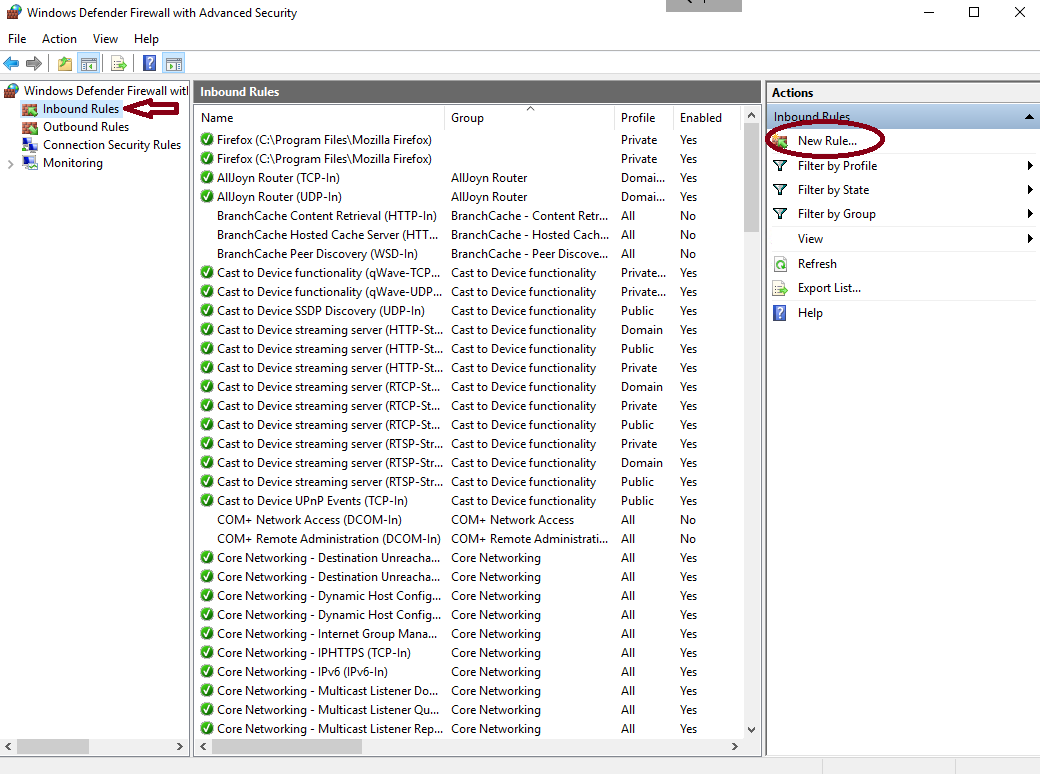
4. Then click "Inbound Rules" from the top left and then click "New Rule...".
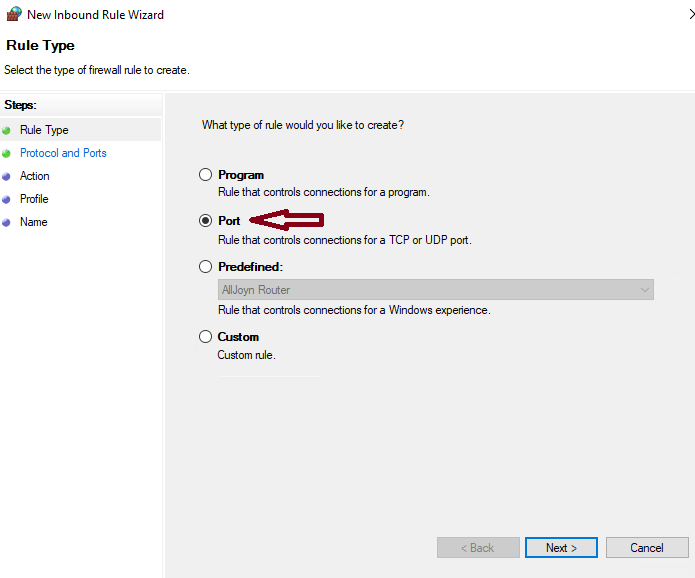
5. Then at the "Rule Type" part choose "Port" and click "Next".
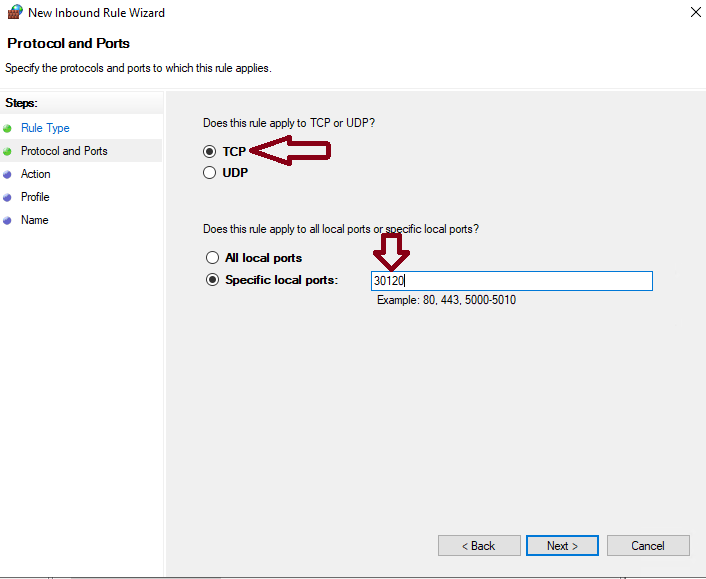
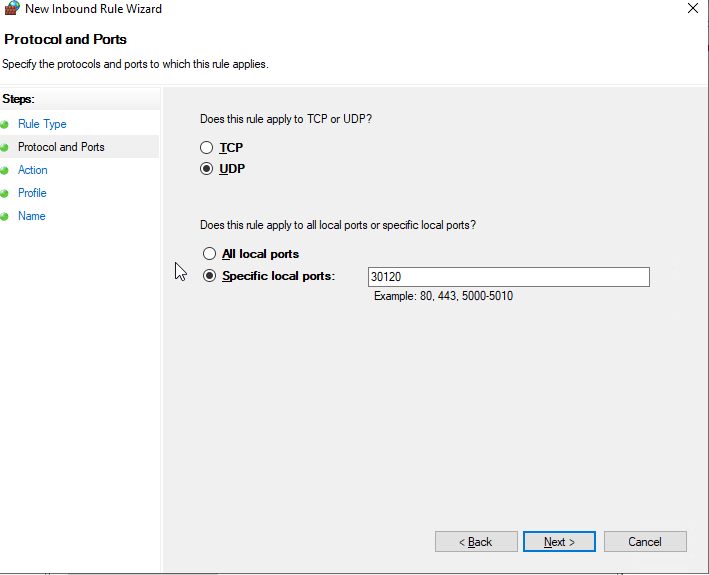
6. Then "Protocol and Ports" part first choose "TCP" and type your port in the textbar. After its done click "Next".
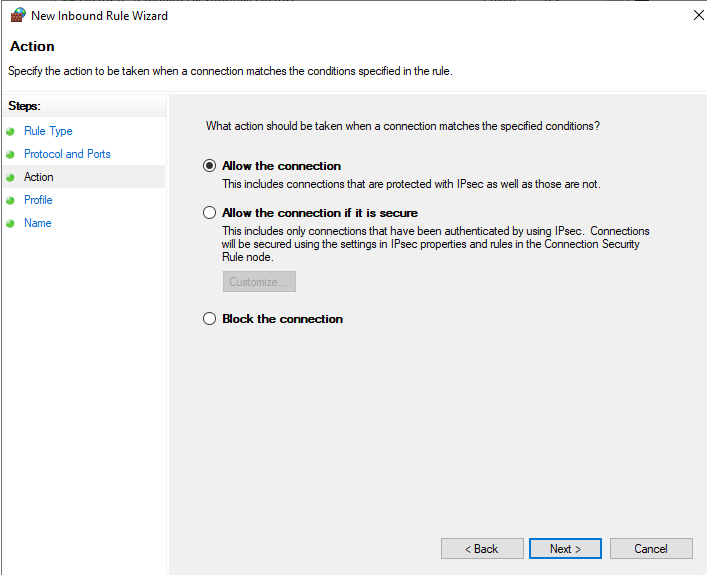
7. At the "Action" part choose "Allow the connection" and click "Next".
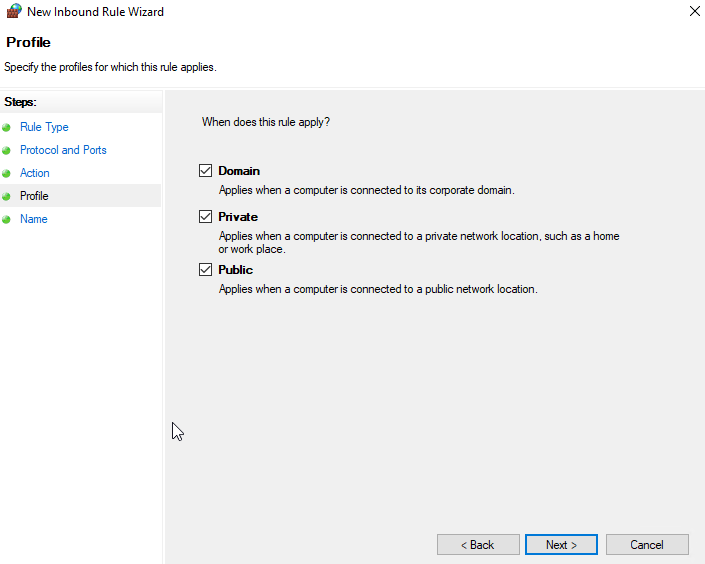
8. At the "Profile" part you can choose all of the options.
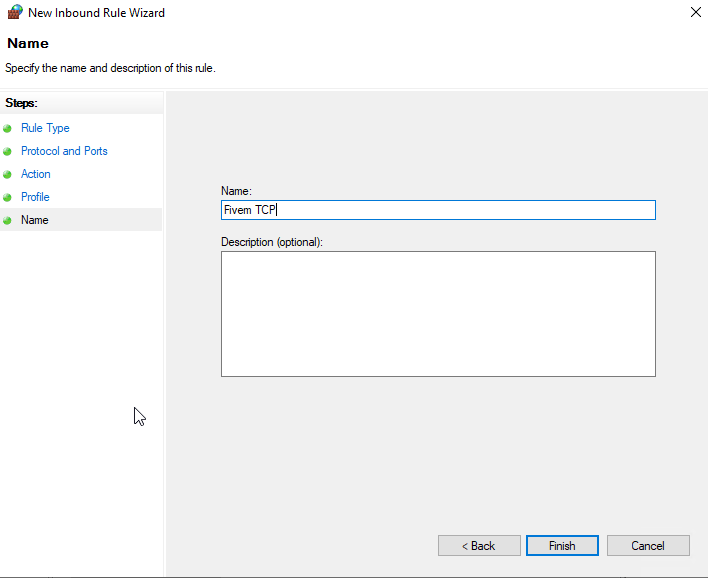
9. Then you can name the new port and click "Finish"
10. You still need to make an UDP port but its easy. Just create a new rule like before but at the "Protocol and Ports" choose "UDP" instead of TCP.
I hope that this guide was helpful and if there is any problems, please contact us.

