cPanel Web Disk instructions
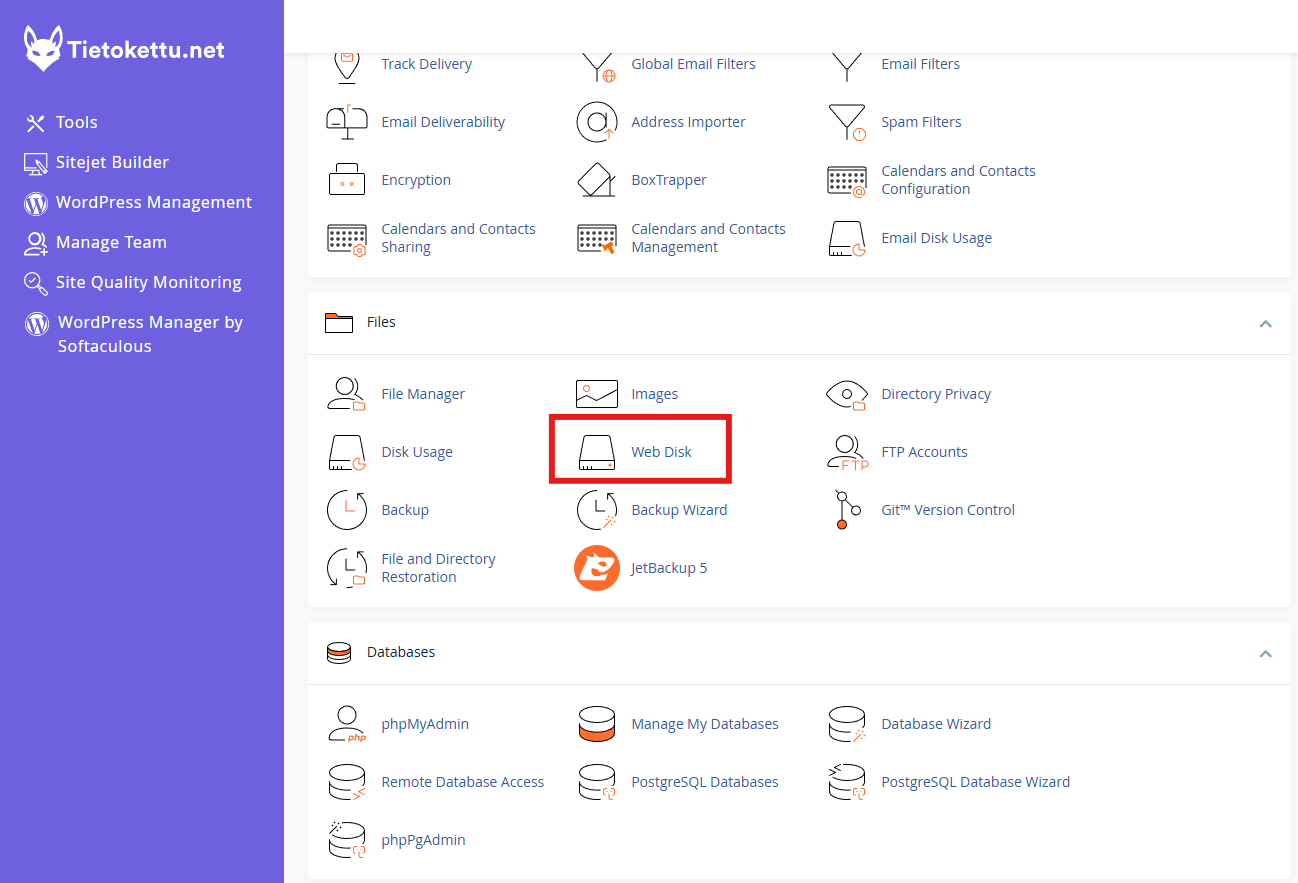
Login to cPaneel and click "Web Disk" at the files section.
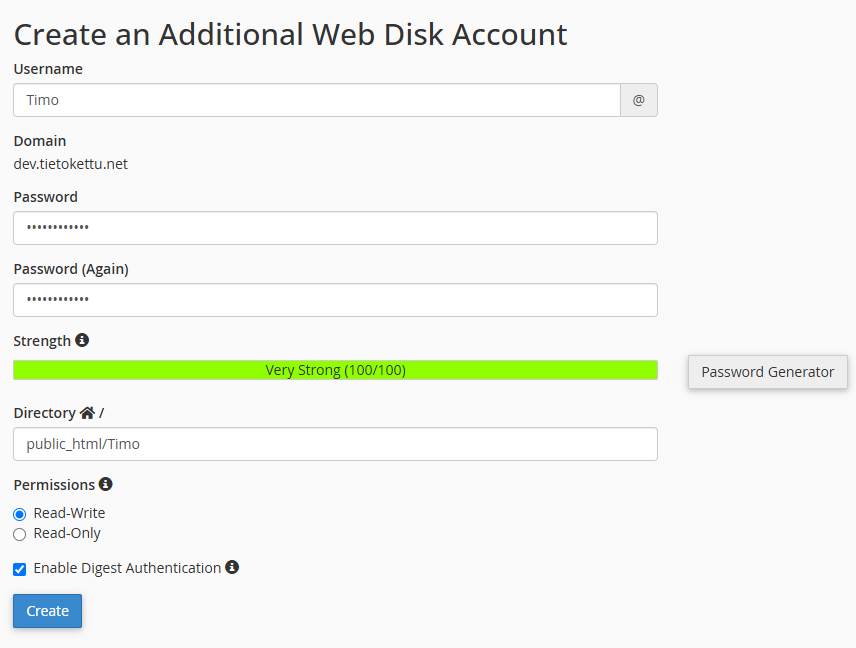
Add the desired name to "Username" , choose your "Domain", create a good password, add the desired directory to "Directory",
at "Permissions" choose wether the account gets full (Read-Write) or limited access (Read-Only) to the directory, if you are using Windows vista, 7, 8 or 10 as your operating system then check "Enable Digest Authentication" and then click "Create".
The Web Disk account has been created, click "Go Back".
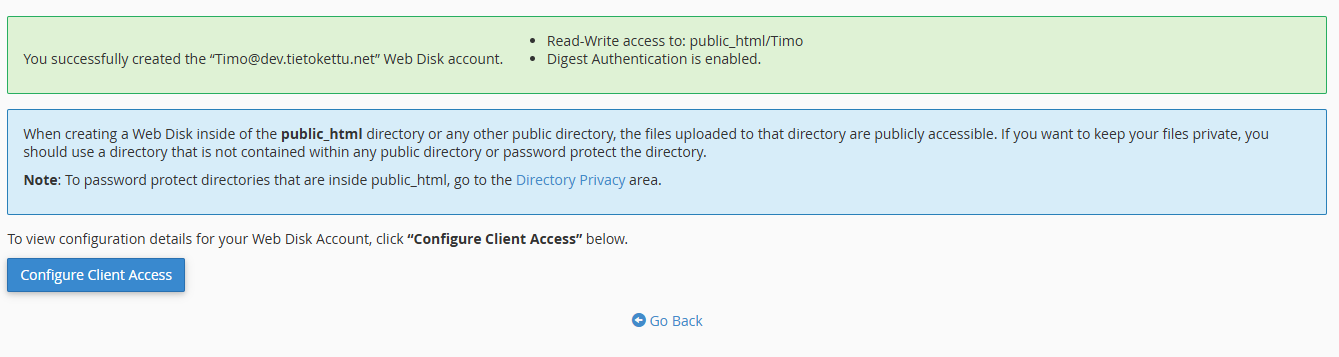
Scroll down to the Manage Additional Web Disk Accounts section and then click "Configure Client Access" on the account you just created.

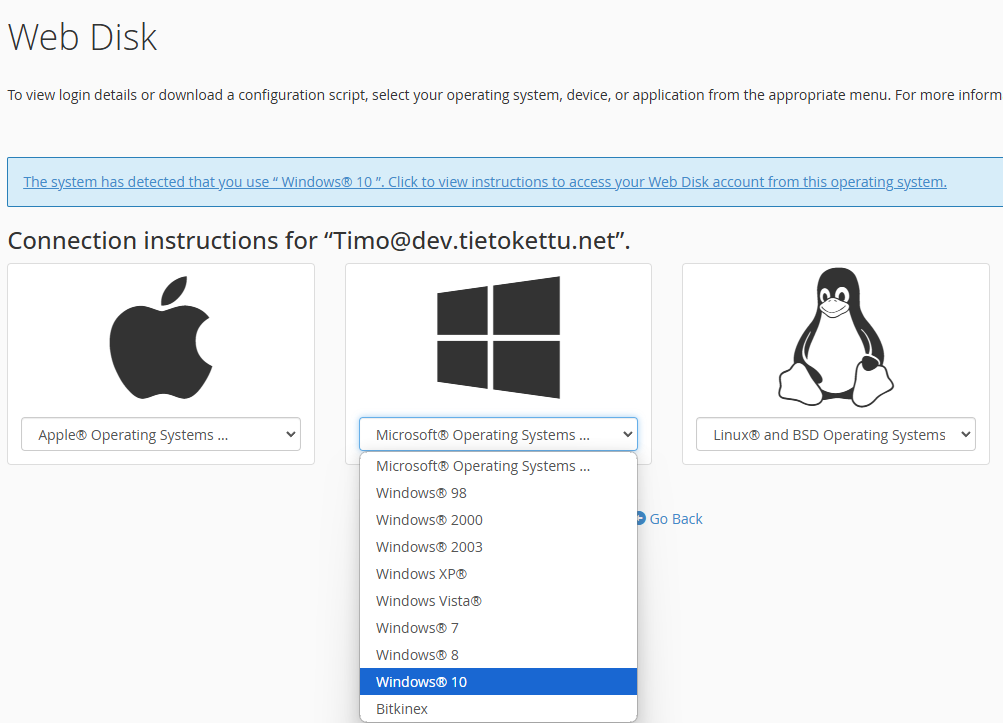
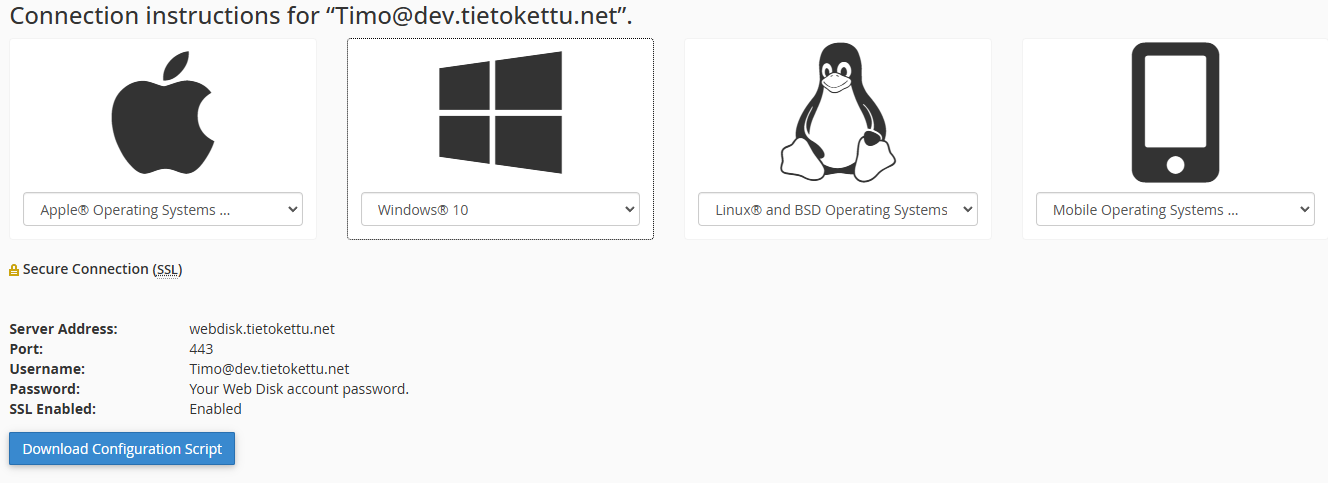
Choose your own operating system.
Now click "Download Configuration Script" it will download a file named webdisk, open it.
Opening the file will most likely show you a warning, proceed without worry.
Opening the file for the first time will most likely will require you to enter a username and password, the login info can be seen on the image above (Username and Password above the download button).

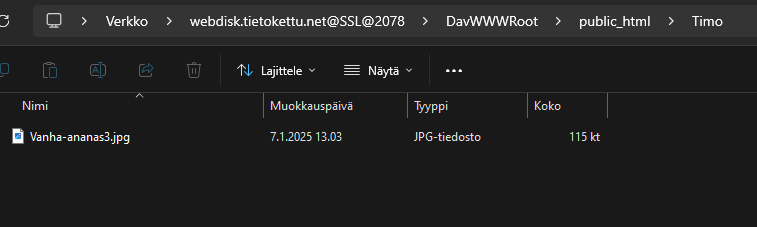
If you now see the chosen directory then everything works as intended.