


How to deploy a Windows server
Welcome to the guide where I will guide you on how to buy a VPS server and get it up and running.
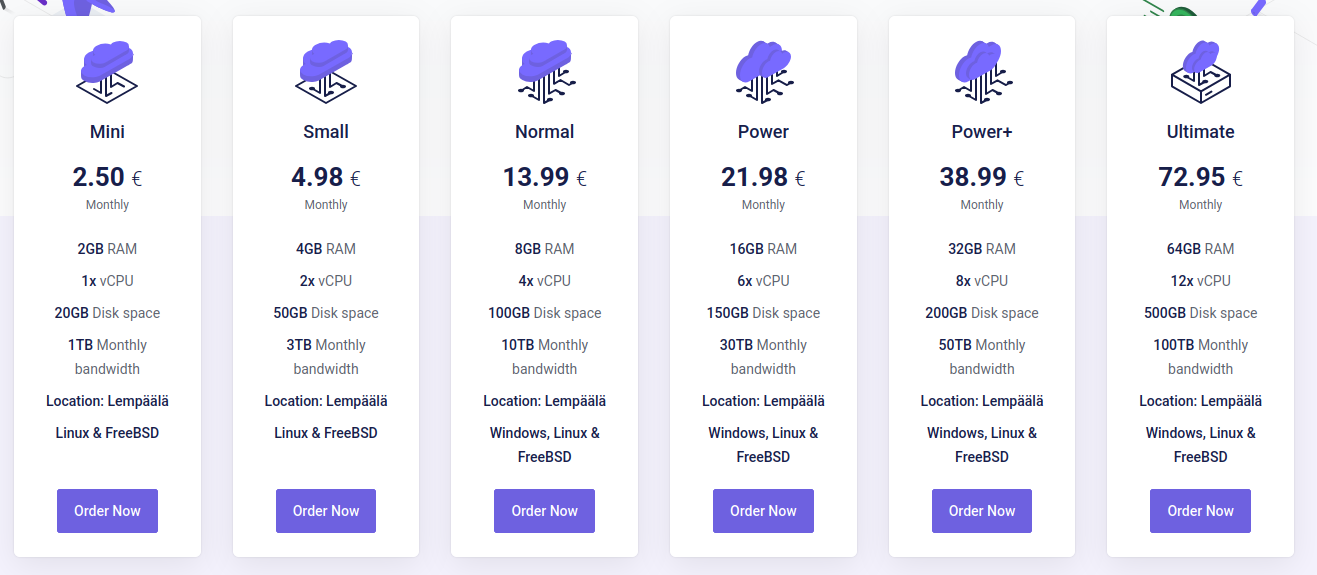
1. How to buy a server
Go to the Tietokettu-VPS page and choose which level of server you want.
When you press the Order Now button, you will end up on a page where you need to enter the server name, its password (which allows you to connect to the server via Remote desktop or something else) and choose which operating system you want.
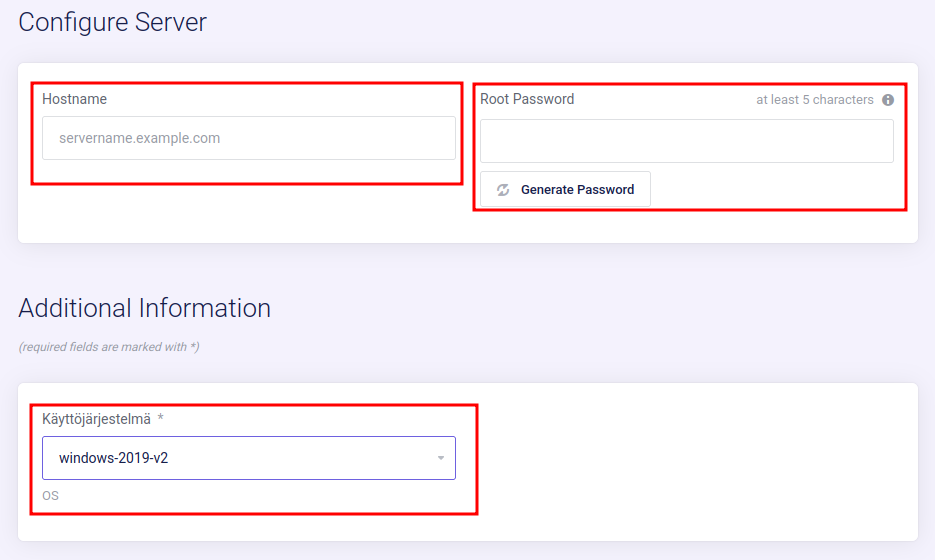
You can also choose from the same page whether you want to backup to the server.
2. How to start using the server
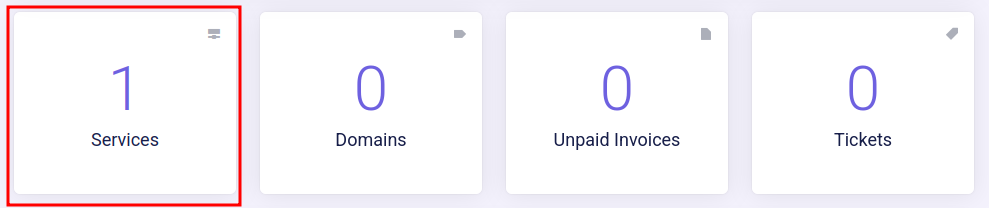
Once you have purchased a server, it will appear on your user account page, which you can access by pressing the button shown in the image below.

Where you go down a little and you should see a section like this, where you click on Services.
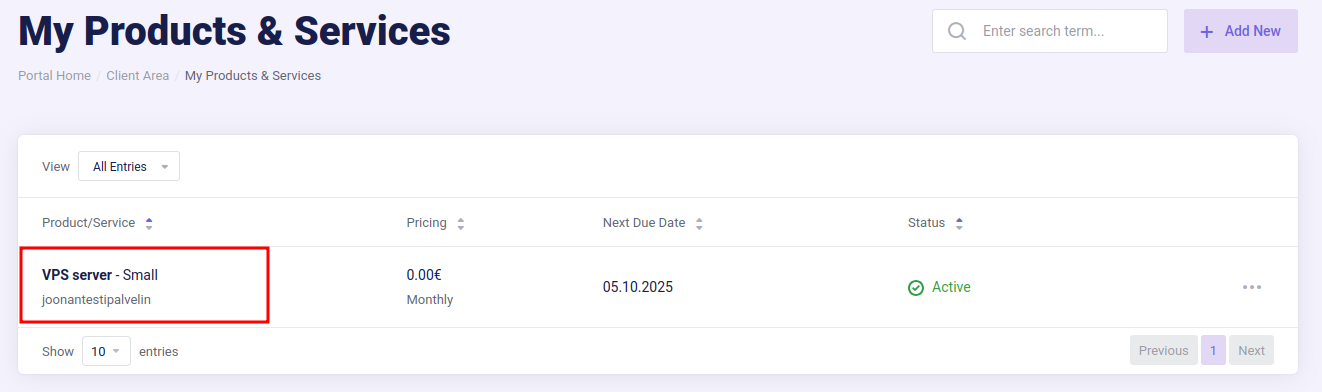
There you will see all the services you own, and you can open a server by clicking on it.
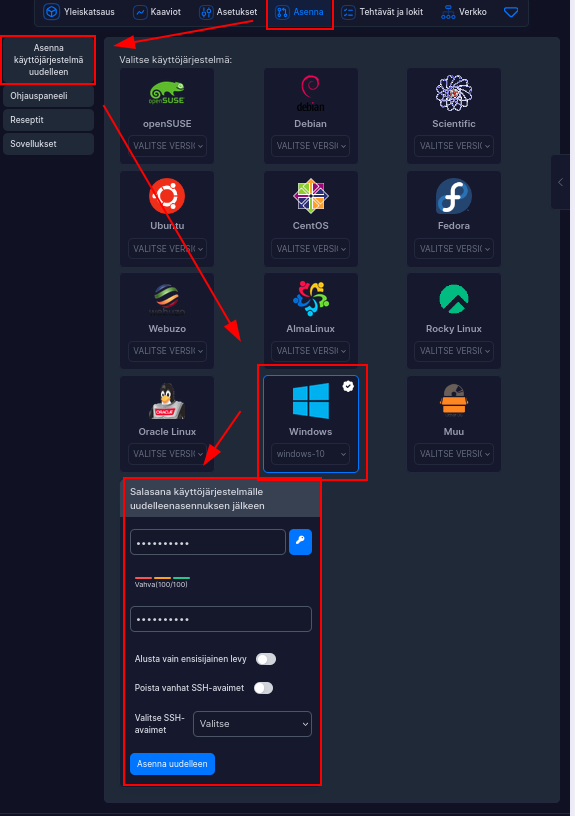
Windows Server Installation (if not already installed)
Navigate to Client Area → Active Services → Manage → Install → Reinstall Operating System → select the desired operating system version.
Enter a password for the operating system and click “Reinstall”.
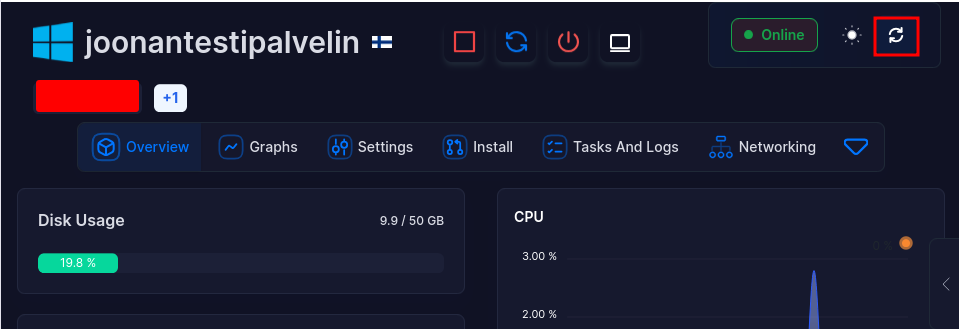
You can monitor the installation progress under “Tasks and Logs”.
During installation, the server will enter a “suspended” state. This is a normal part of the installation process.

The installation will take some time, so please be patient. The server will automatically restart once the installation is complete.
From here you can check if the server is up. From the top right you can refresh the view again and on the left you can see if the server is up.
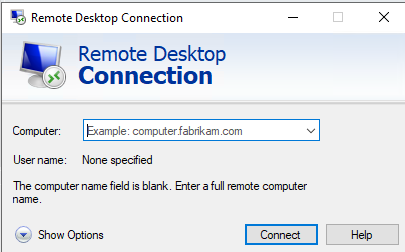
Now you can test if the Remote Desktop connection works.
Open the Remote Desktop Connection application, enter the server’s IP address in the text field, and click Connect.
If you see the section shown in the image below, click on Show Options.
If not, continue to step 4.
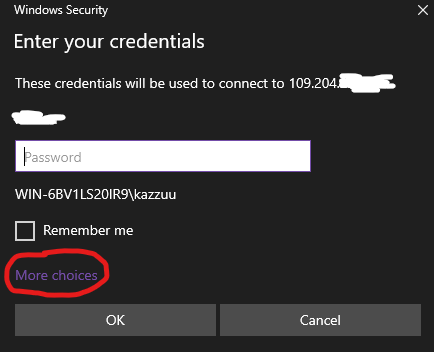
Next, click on Use a different account.
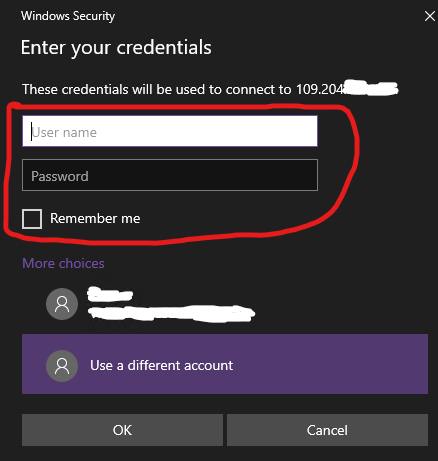
Next, type Administrator in the Username field. Enter the password you set for the server in the Password field, and then click OK.
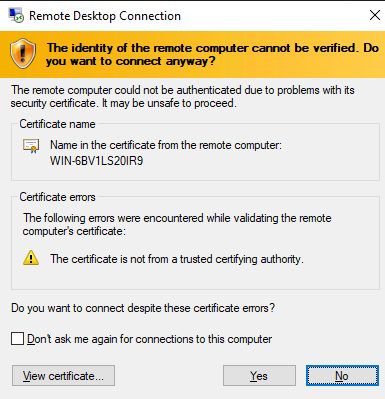
Next, click the Yes button.
The Remote Desktop connection has now been established. If you have reached this point, you have successfully completed the objective of this guide. Therefore, do not proceed to the following steps.
4. Changing Remote Desktop Connection settings with VNC
Before you can log in with remmina/remote desktop, you need to use VNC to turn on remote desktop.
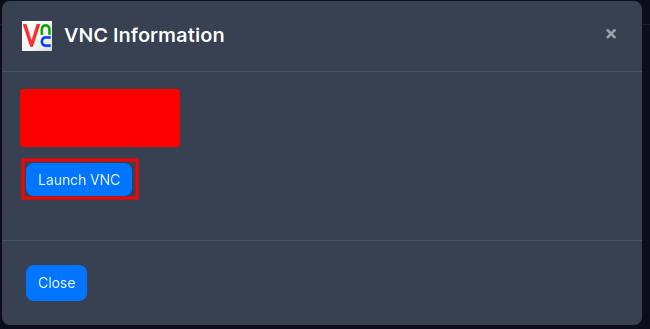
You can turn vnc on by pressing the button in the red box.

After which you scroll down the page to see a box like this where you click Launch VNC.
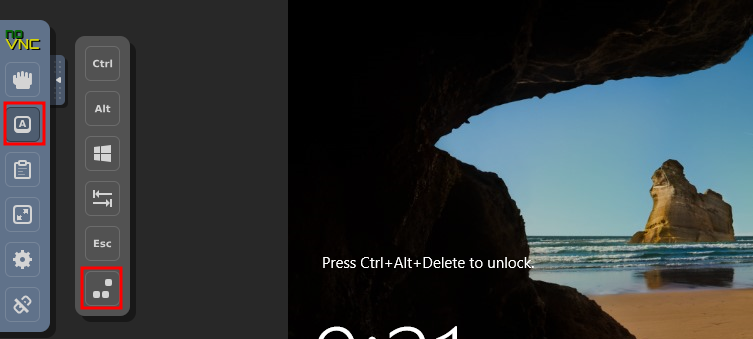
When vnc opens you need to go to the sidebar and press second button from the top and there click the one at the bottom.
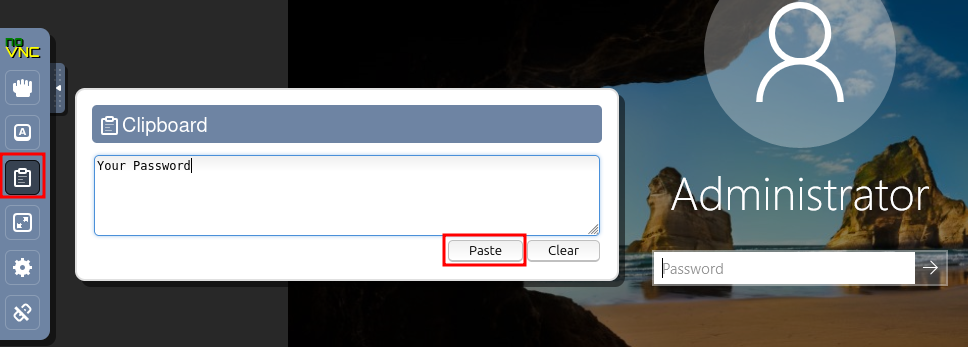
When you get to the login page, you can either type out your password or, if you have it saved on your computer you can copy and paste it in to this box and then clicking the paste button
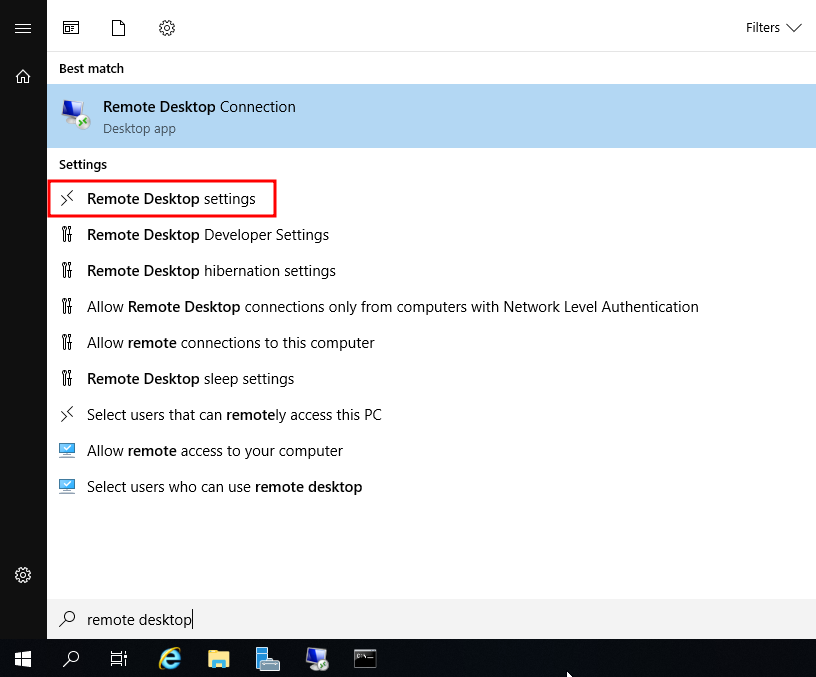
Look for Remote Desktop settings and go there.
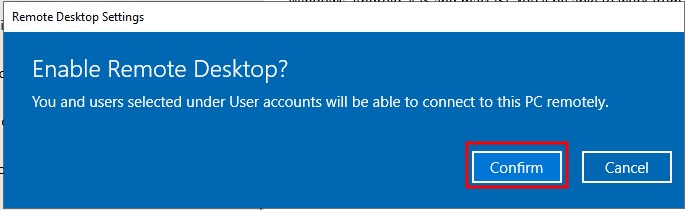
Click Enable Remote Desktop and then Confirm.
Then you can close vnc and continue with this guide. (If you are on a linux device, go continue here)
5. Remote Desktop Connection
Open the Remote Desktop Connection application and enter the server's IP address in the text line and press connect.
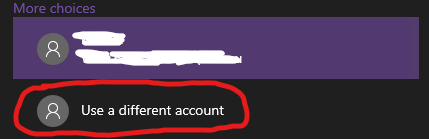
When you see the screen shown below, click on More choices.
Next, click on Use a differemt account.
Next, in the Username text field, type Administrator. In the Password field, type the password you have set on the server, and then click Ok.
Next, click the Yes button.
And then you've gotten into your server.


