Näytän tässä ohjeessa, kuinka voit avata uuden portin Windows serverillä. Käytän tässä esimerkkinä fivem serverin portteja.
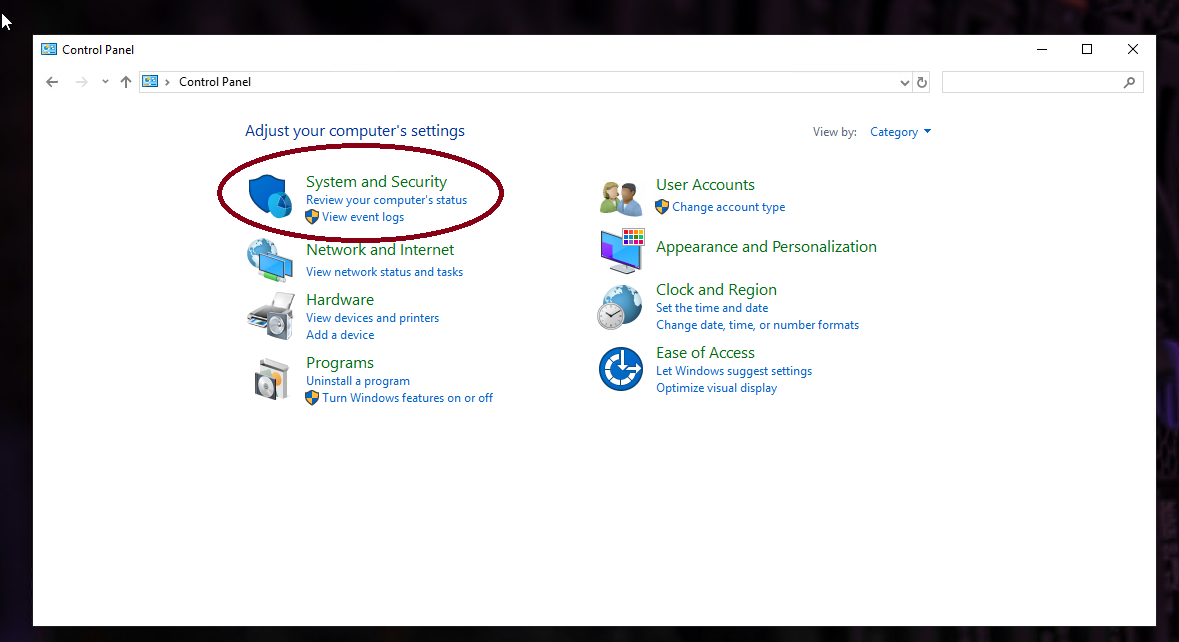
1. Ensimmäisenä avaa ohjauspaneeli Windows serverilläsi ja paina "System and Security"
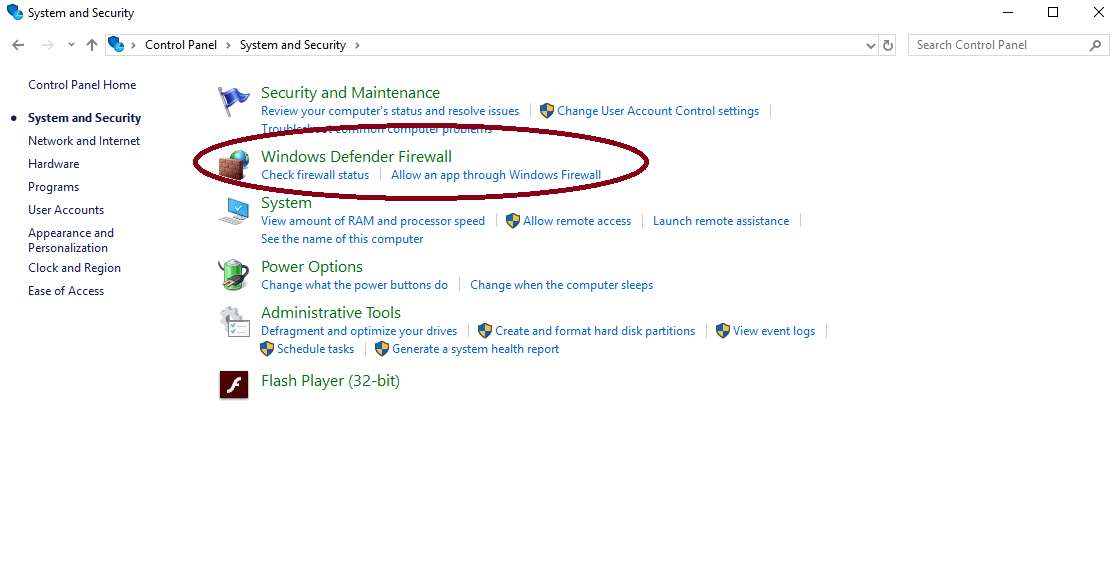
2. Sitten paina "Windows Defender Firewall".
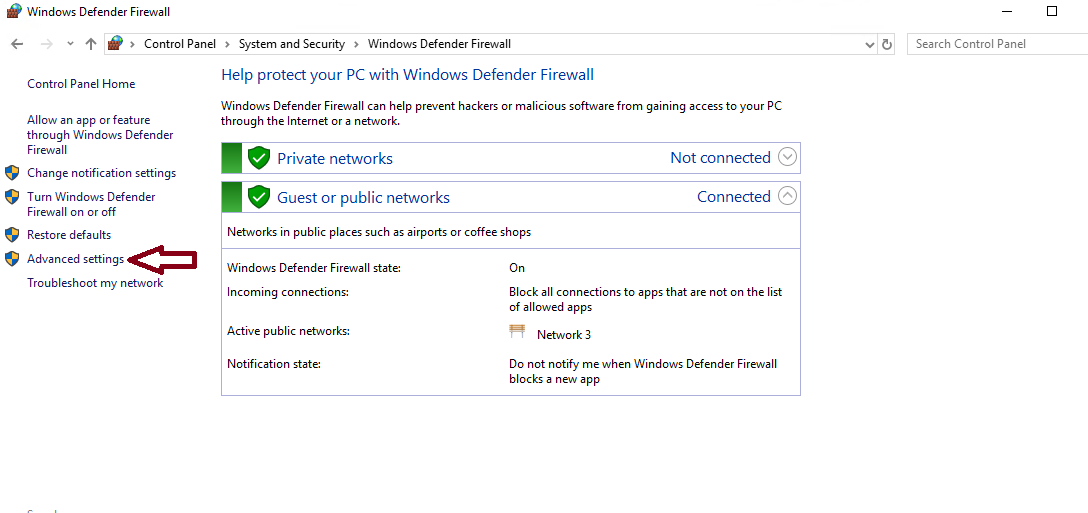
3. Sitten paina "Advanced Settings" vasemmalta.
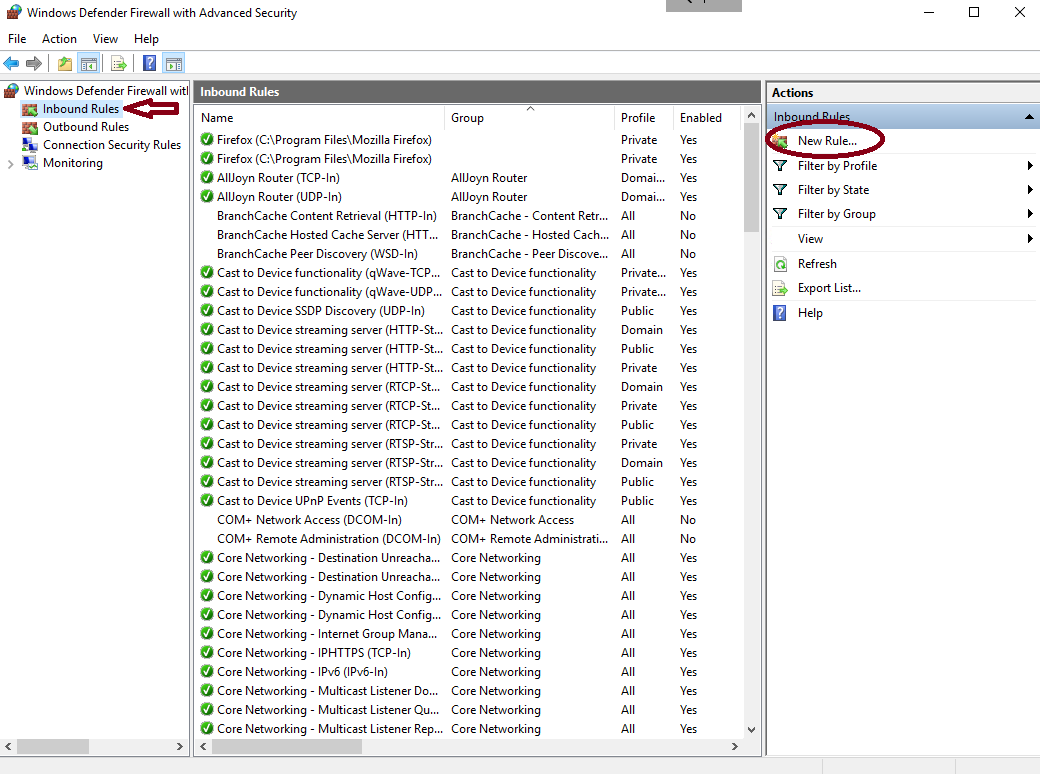
4. Sitten paina listasta "Inbound Rules" ja sitten paina "New Rule..."
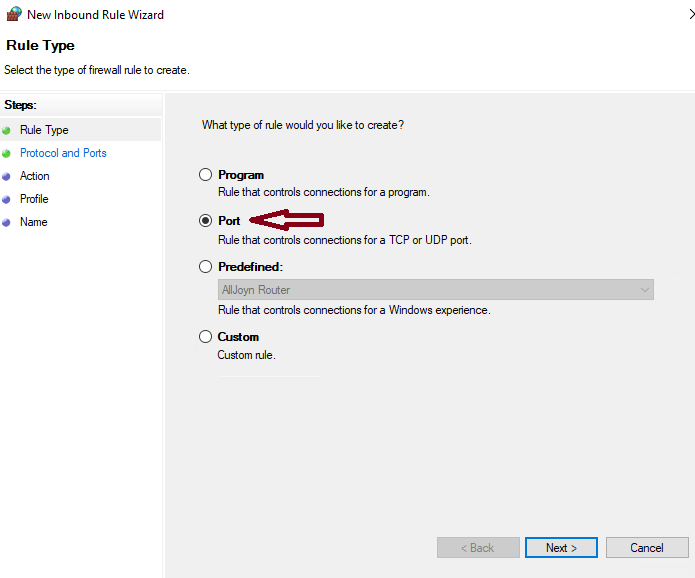
5. Kun määrität uutta sääntöä valitse ensimmäisessä kohdassa "Port" ja paina "Next".
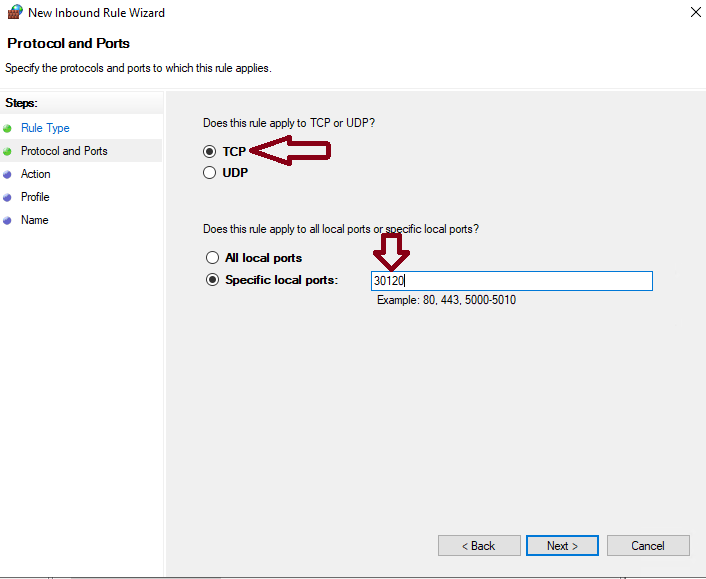
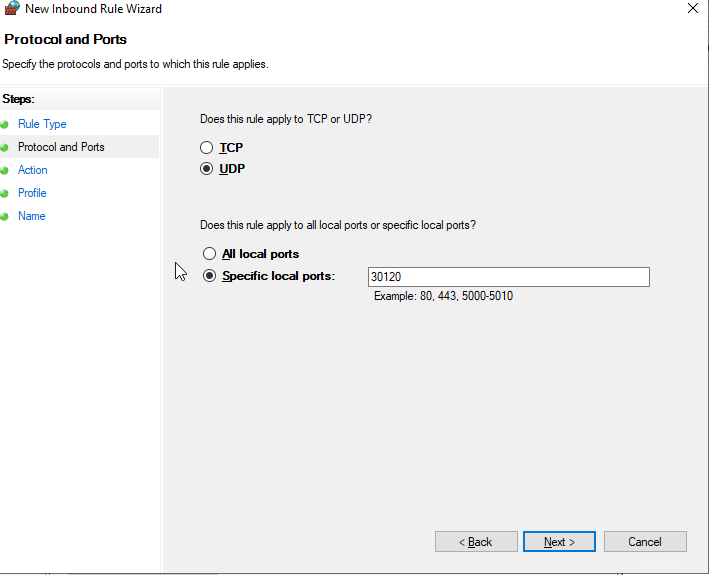
6. Protocol and Ports kohdassa valitse ensin TCP ja kirjoita portti jonka haluat avata, Fivem serverille portti on 30120. Jatkaaksesi paina "Next".
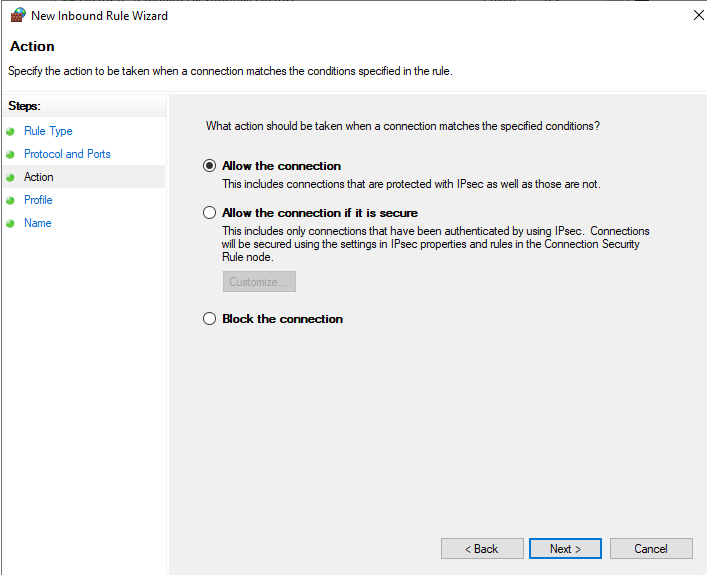
7. Action kohdassa valitse "Allow the connection" ja paina "Next".
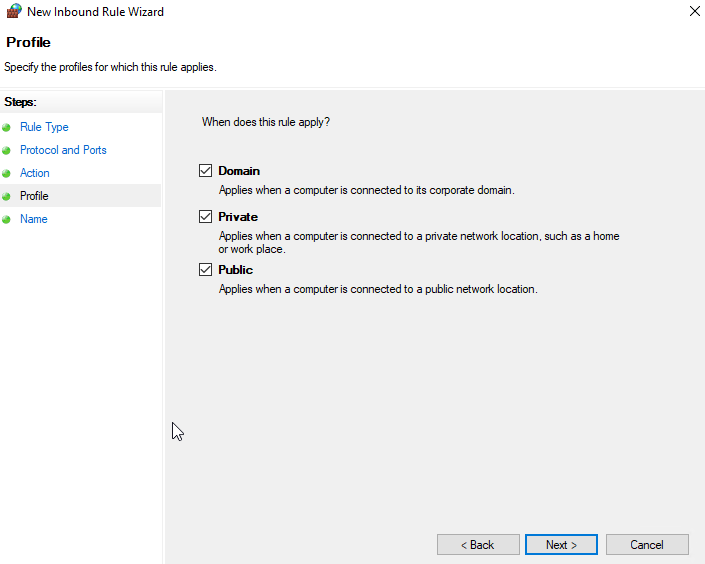
8. Profile kohdassa voit valita kaikki kohdat ja paina "Next".
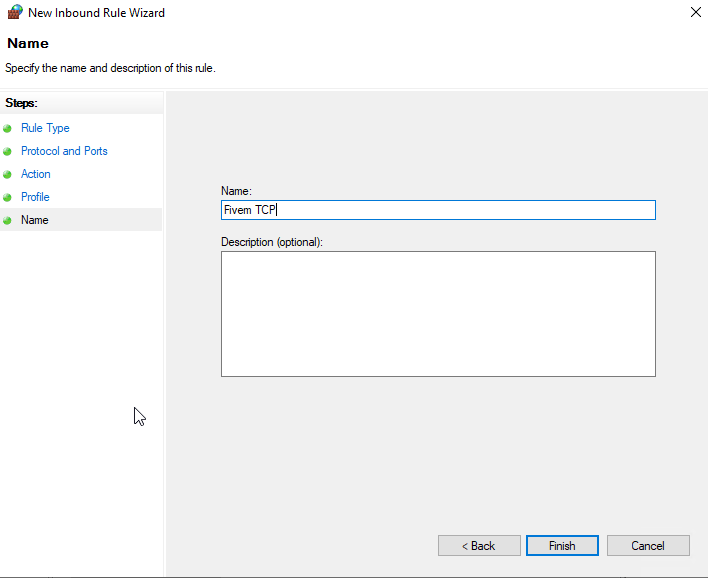
9. Name kohdassa voit nimetä uuden säännön. Kun olet valmis paina "Finish".
10. Sitten sinun pitää tehdä vielä uusi portti täysin samalla tavalla, mutta valitse tässä kohdassa "UDP" TCP:n sijasta.
Ja nyt sinulle on avattu uusi portti Fivem serverille. Jos ongelmia ilmenee ota meihin yhteyttä.


