


Verkkokaupan rakentaminen
Jos et ole vielä ladannut WordPressiä katso ohje: WordPressin käyttöönotto
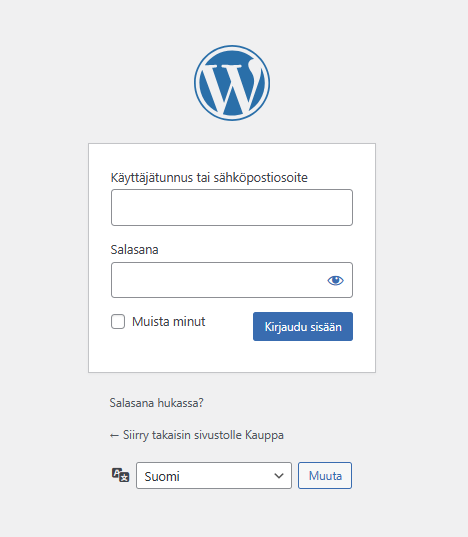
Kirjaudu WordPressin hallintapaneeliin
Siirry sivustollesi: https://DOMAINISI/wp-admin ja kirjaudu
Asenna verkkokaupan laajennus, tässä esimerkissä WooCommerce.
Asenna WooCommerce:
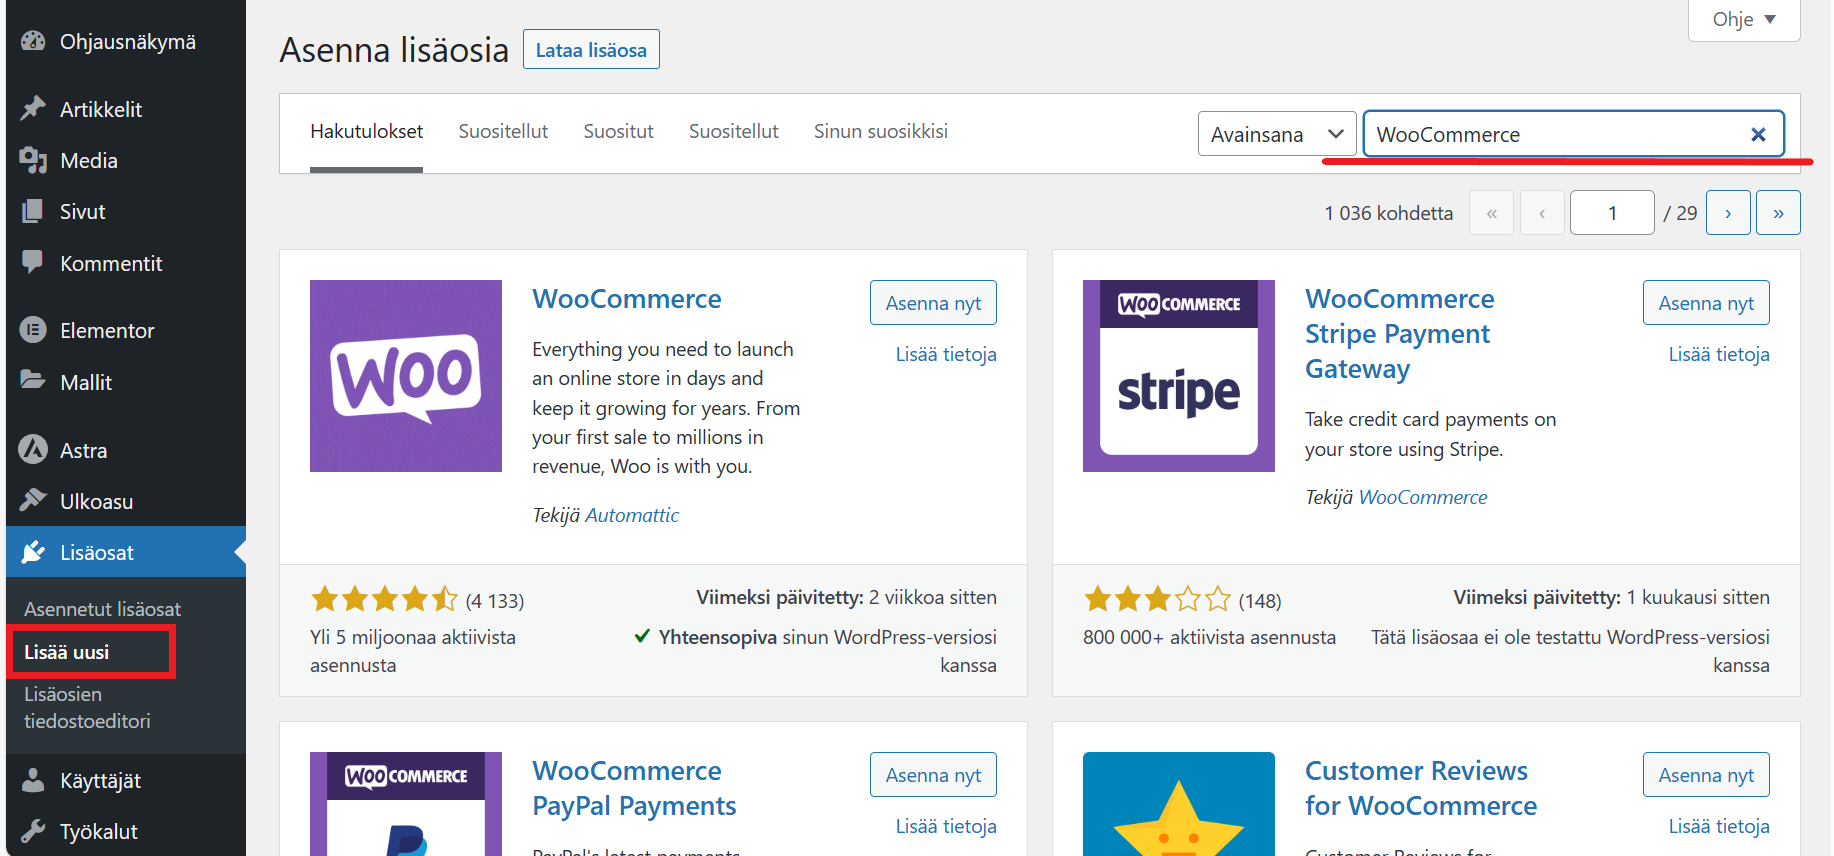
Mene "Lisäosat" ja klikkaa "Lisää uusi".
Etsi "WooCommerce" ja asenna se klikkaamalla “Asenna nyt”. Aktivoi lisäosa klikkaamalla “Ota käyttöön”.
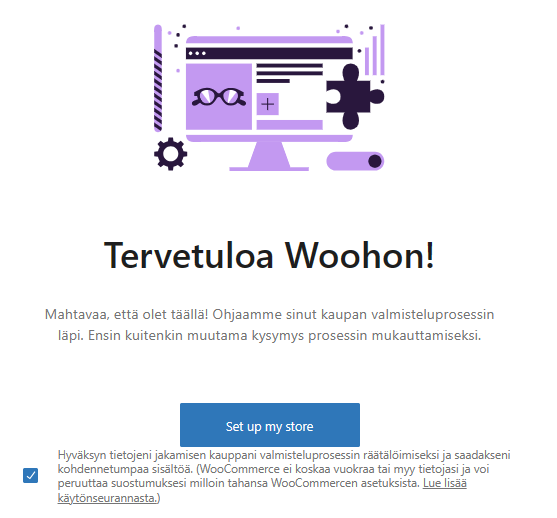
Kun WooCommerce on aktivoitu, se ohjaa sinut aloitusasetusten läpi. Voit määrittää valuutan, maksutavat, toimitusvaihtoehdot ja muut tärkeät tiedot.
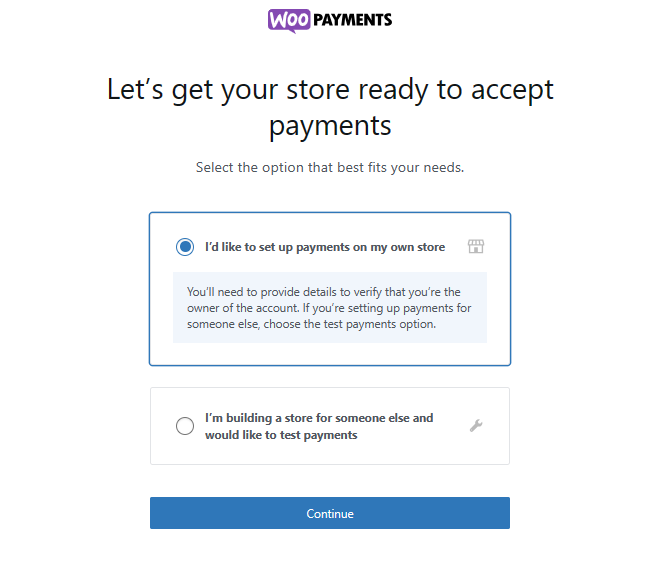
Valitse haluatko asentaa WooCommercen suosittelemia lisäosia, WooCommerce Payments on maksuntarjoaja, tarvitset maksuntarjoajan palveluja maksujen suorittamiseen esimerkiksi maksukortilla. WooCommerce Paymentsin voi asentaa tässä vaiheessa, tai voit hakea ja asentaa lisäosan myöhemmin. Odota lisäosien (WooCommerce Payments) asennus.
Lisää ja poista tuotteita:
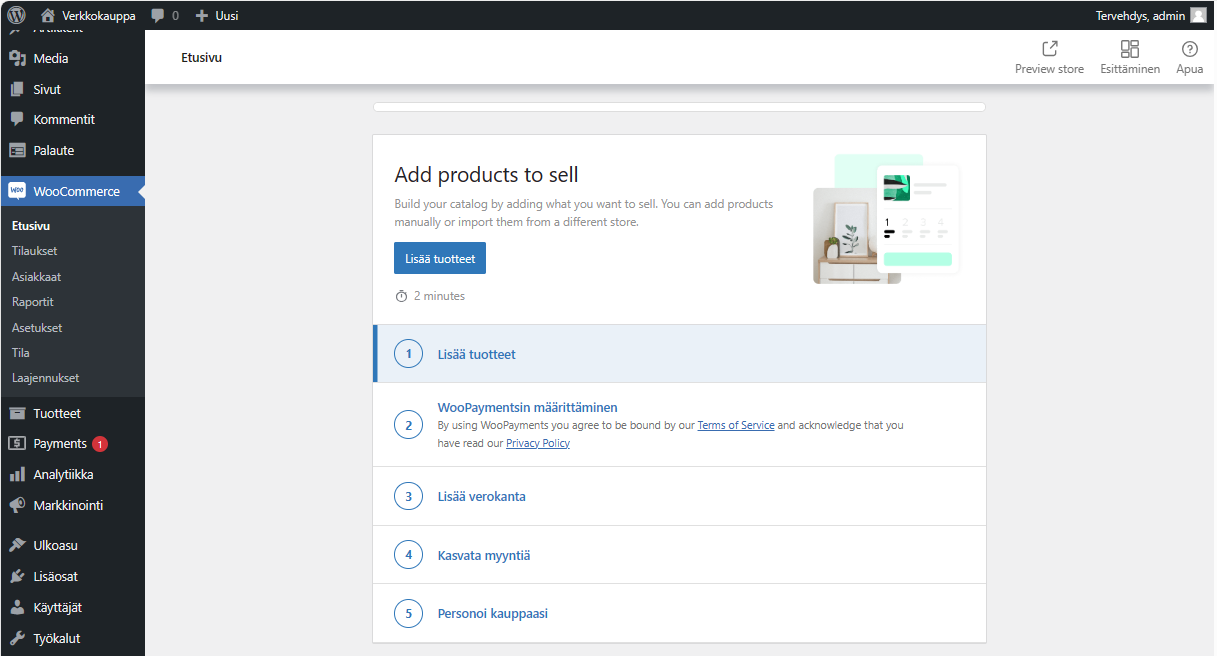
Siirry WooCommerce etusivulle ja seuraa ohjeita.
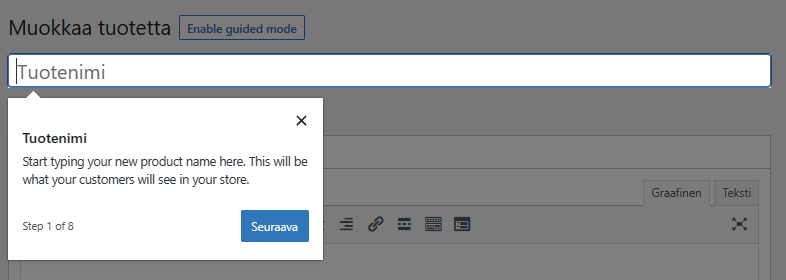
Seuraa ensin vaiheet tuotteen lisäämiseen.
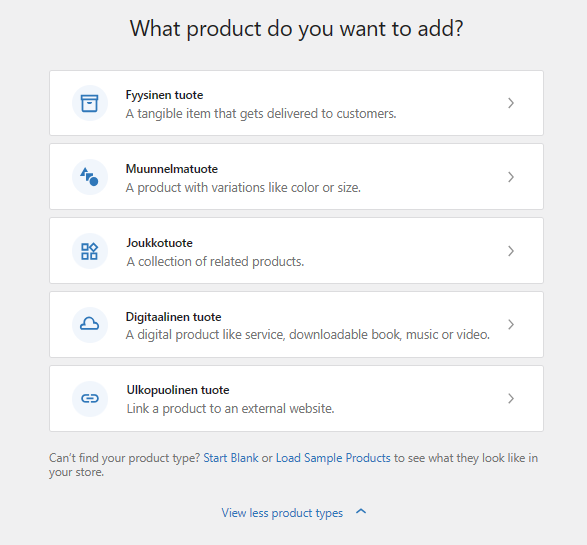
Ohjelma opastaa sinulle tuotteen lisäämisen. Täytä tuotetiedot, kuten
nimi, kuvaus, hinta ja varastotiedot.
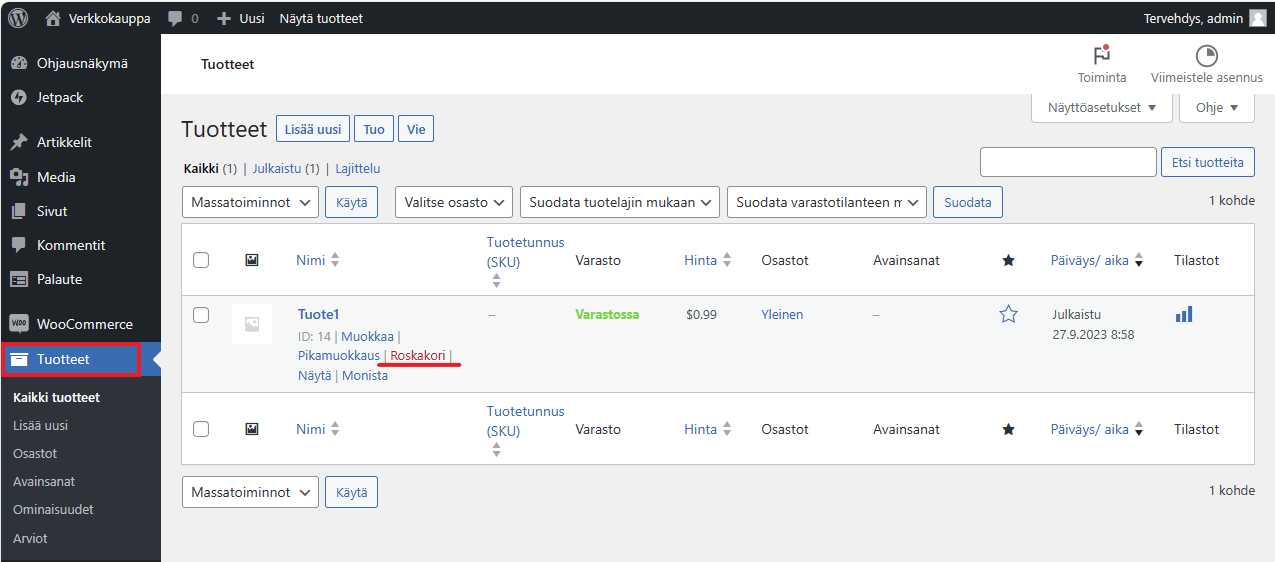
Voit lisätä tuotteita valitsemalla valikosta "Tuotteet" ja lisää uusi.
Voit poistaa tuotteita valitsemalla valikosta “Tuotteet”, viemällä hiiren tuotteen päälle, näkyviin ilmestyy vaihtoehto “Roskakori”.
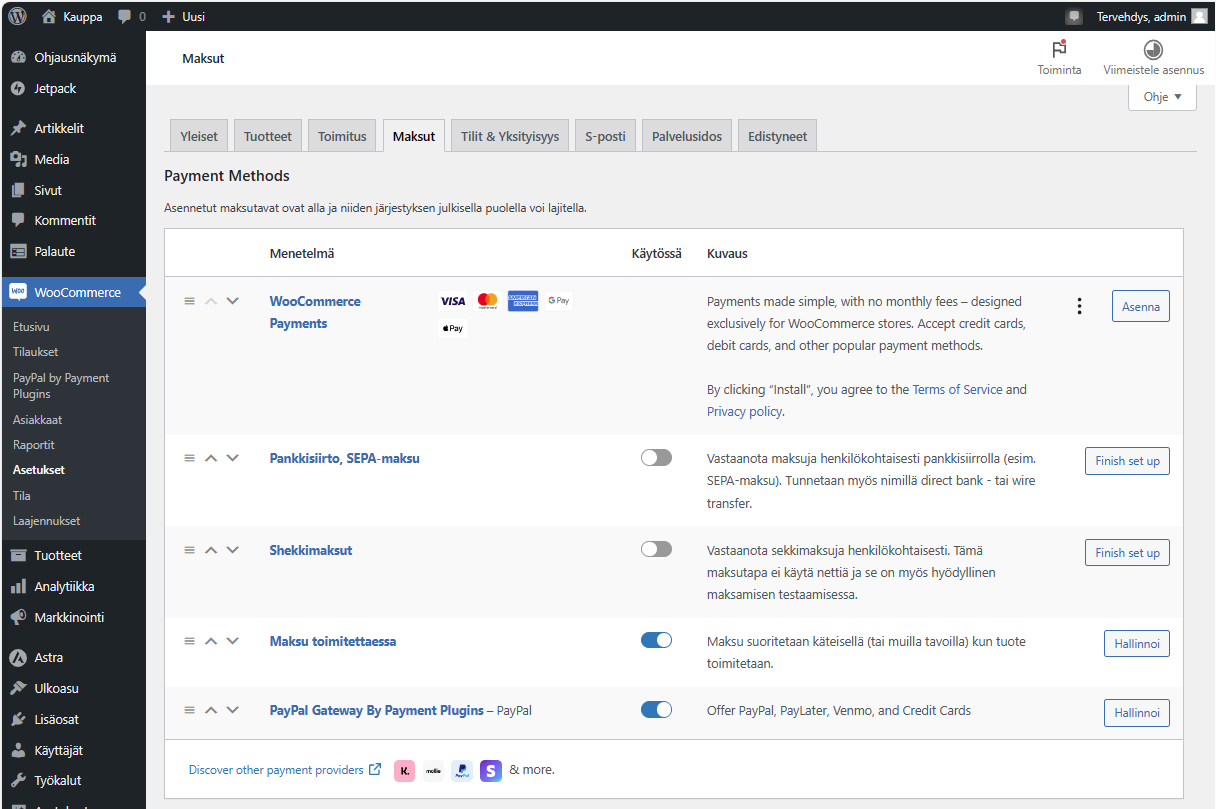
Maksutavat:
Siirry takaisin WooCommerce etusivulle ja seuraa ohjeita.

Valitse maksuntarjoaja
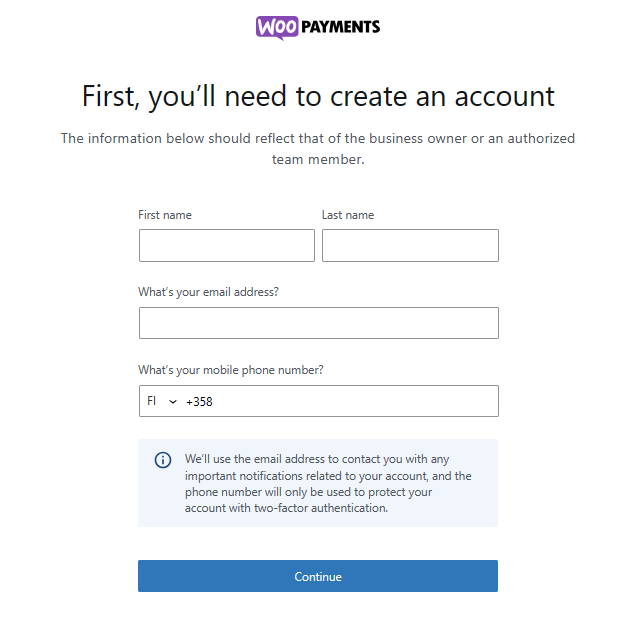
Esimerkiksi WooCommerce Payments ja luo tili maksuntarjoajalla:
Siirry valitsemasi maksuntarjoajan verkkosivustolle ja luo tili, jos sinulla ei vielä ole sellaista. Noudata heidän ohjeitaan ja täytä tarvittavat tiedot.
Huomioithan, että myös kuukausimaksuttomat maksunvälityspalvelut yleensä veloittavat maksutapahtumista pienen hyvityksen. Esim. What are the fees for WooPayments? - WooCommerce
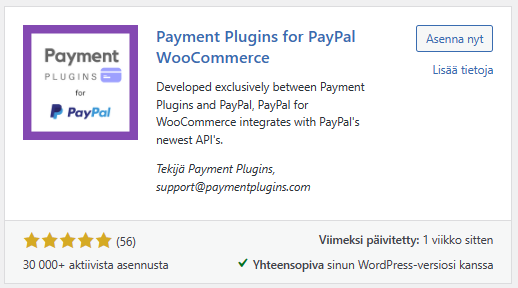
Valitse, mitkä maksutavat haluat tarjota asiakkaillesi, kuten luottokortit, PayPal jne. Käyttääksesi PayPalia WooCommercessa tarvitset myös “Payment Plugins for PayPal WooCommerce” lisäosan.
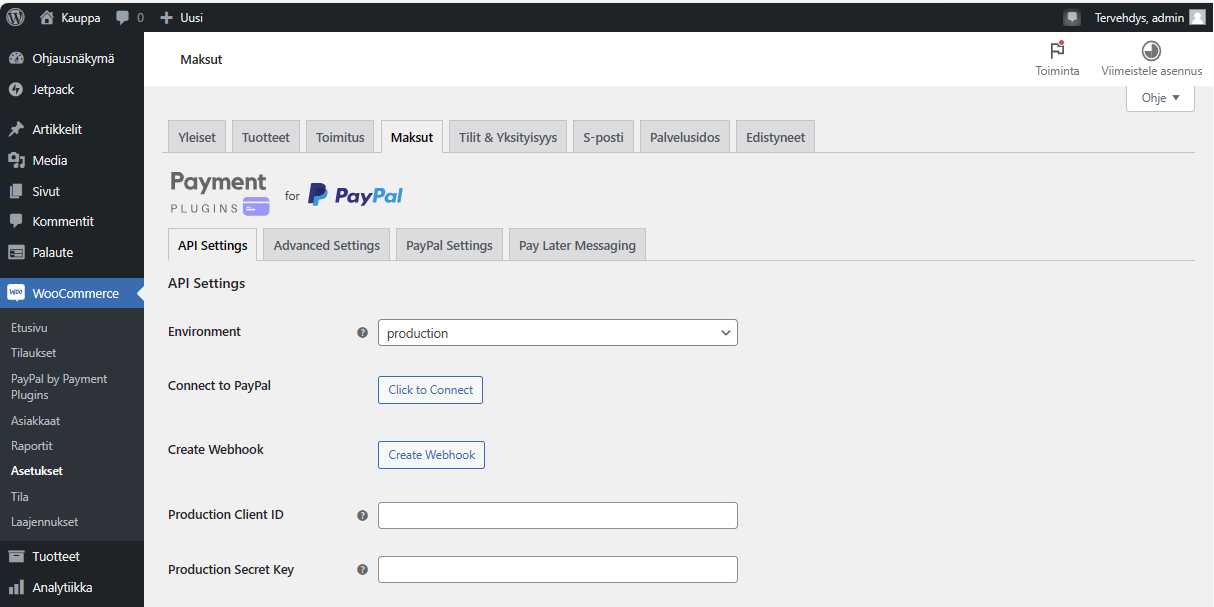
Aloittaaksesi PayPalin käytön yrityksellesi, tulee sinun luoda PayPal-tili PayPalin sivuilla: PayPal Rekisteröityminen. Kun olet rekisteröitynyt maksuntarjoajan palveluun, sinun on haettava API-avaimia. Tarvitset API-avainta verkkokauppasi ja maksuntarjoajan välisen yhteyden muodostamiseksi.
Määritä maksutapojen asetukset
Mene WooCommerce-asetuksiin “Settings”.
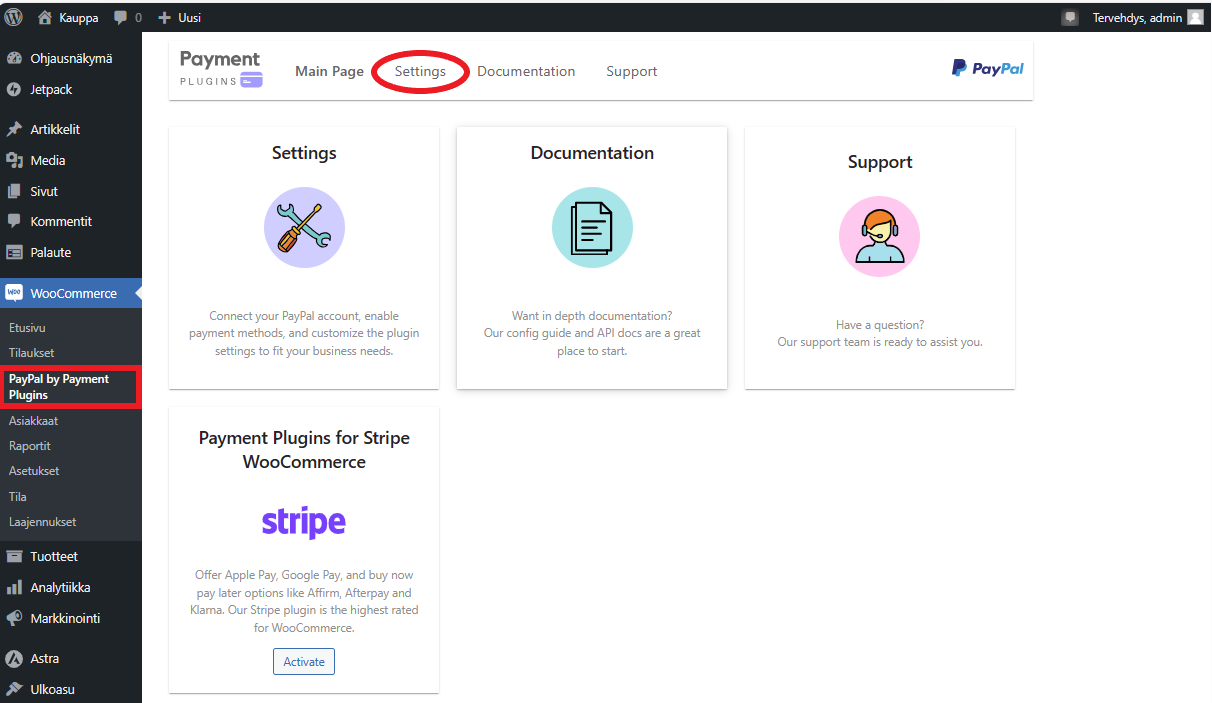
Valitse "Maksutavat" ja lisää haluamasi maksuntarjoaja. Syötä tarvittavat tiedot, kuten API-avaimet ja asetukset.
Klikkaa uudestaan “Maksut” päästäksesi valitsemaan maksutavat.
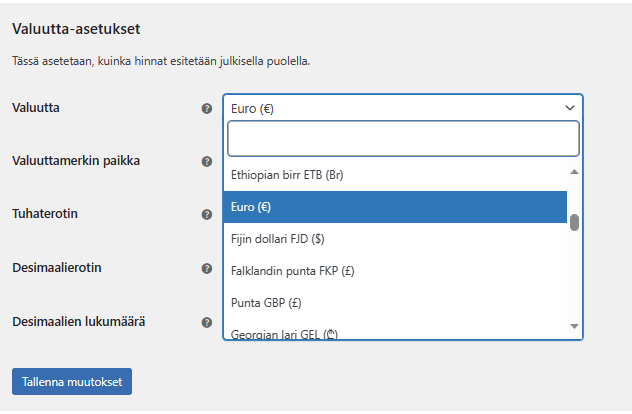
Määritä muut tärkeät verkkokauppaan liittyvät asetukset, kuten valuutta, “Yleiset” osiossa.
Määritä muut tärkeät verkkokauppaasi koskevat asetukset, esimerkiksi toimitustavat “Toimitustavat” välilehdellä. Voit valita toimitus alueen sekä toimitusvaihtoehdot, kuten posti, nouto, kotiinkuljetus jne. Määritä
toimituskulut tarpeen mukaan.
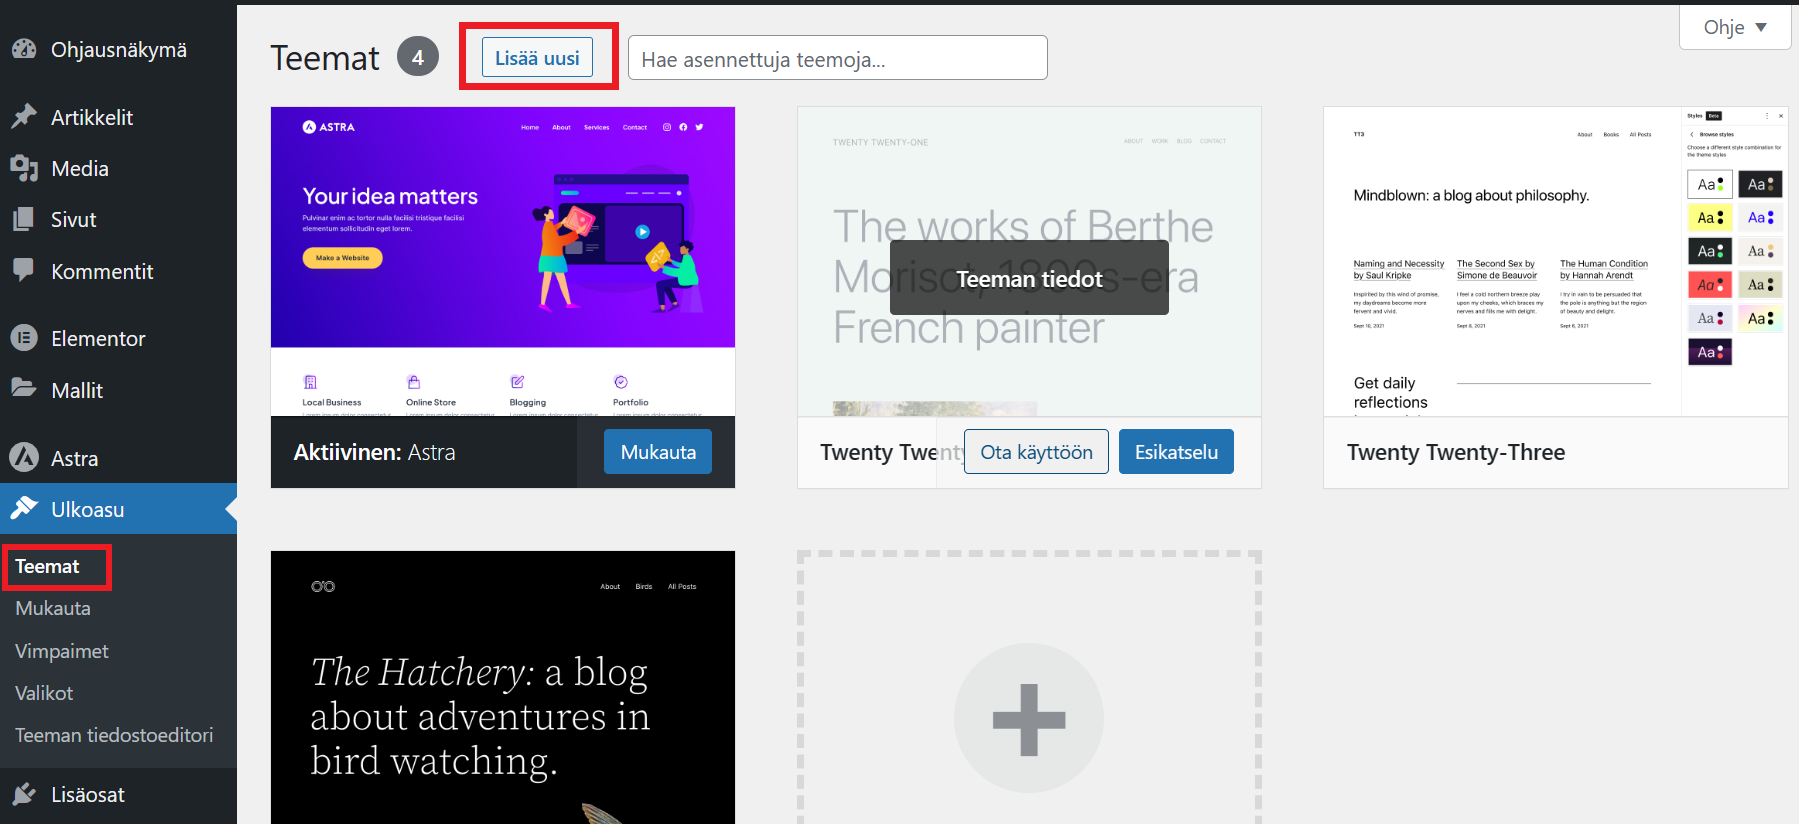
Suunnittele verkkokauppa:
Valitse verkkokaupallesi sopiva teema tai mukauta olemassa olevaa teemaa. Voit
tehdä sen kohdassa "Ulkoasu" ja "Teemat". Käytän tässä ohjeessa Astra-teemaa.
Teeman valikkoon pääset valitsemalla “Mukauta”. Teemassa pystyt muokkaamaan verkkokaupan ulkoasua.
“Yleinen” osiossa voit muokata esim. sivun värejä, tekstejä ja painikkeita.
“WooCommerce” osiossa voit muokata pääsivun lisäksi muiden verkkokauppasi sivujen, kuten kassa-sivun, ulkonäköä.
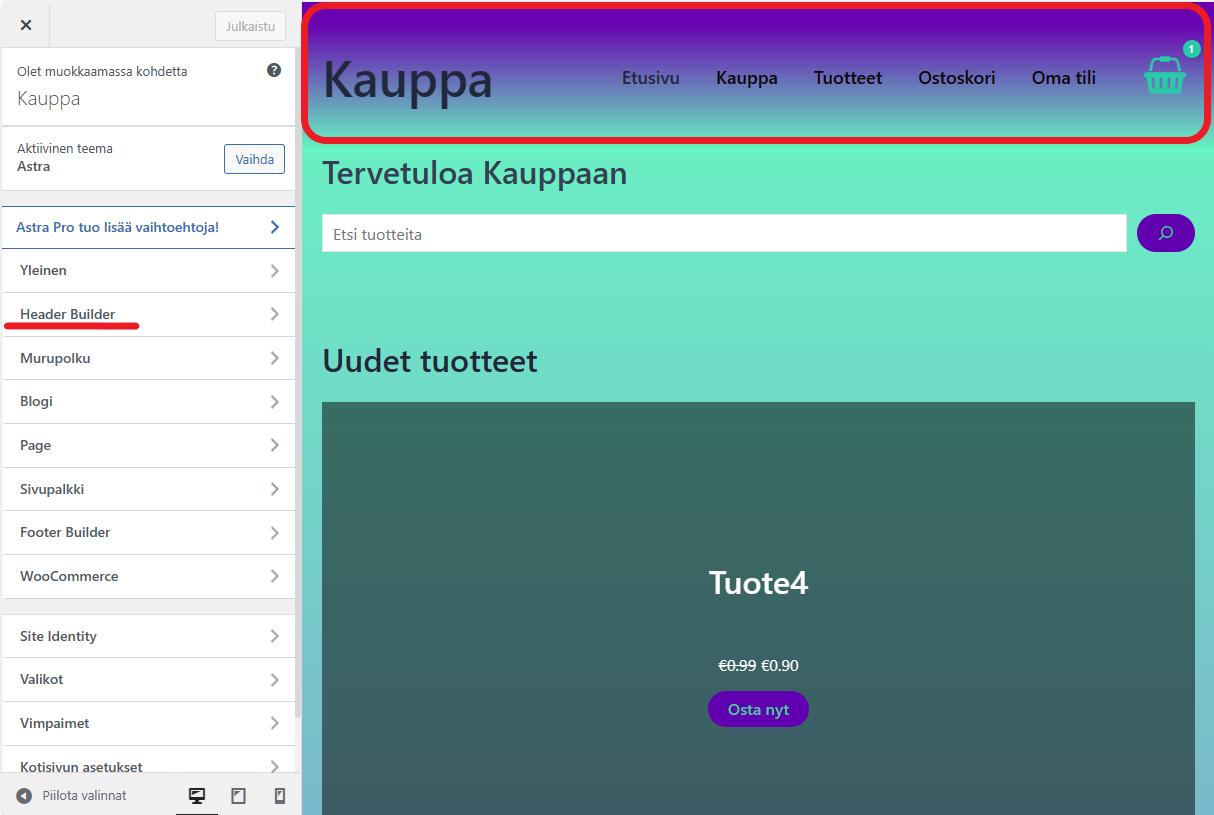
“Header” osiossa voit muokata sivuston yläpalkkia.
“Footer” osiossa voit muokata sivuston alapalkkia.
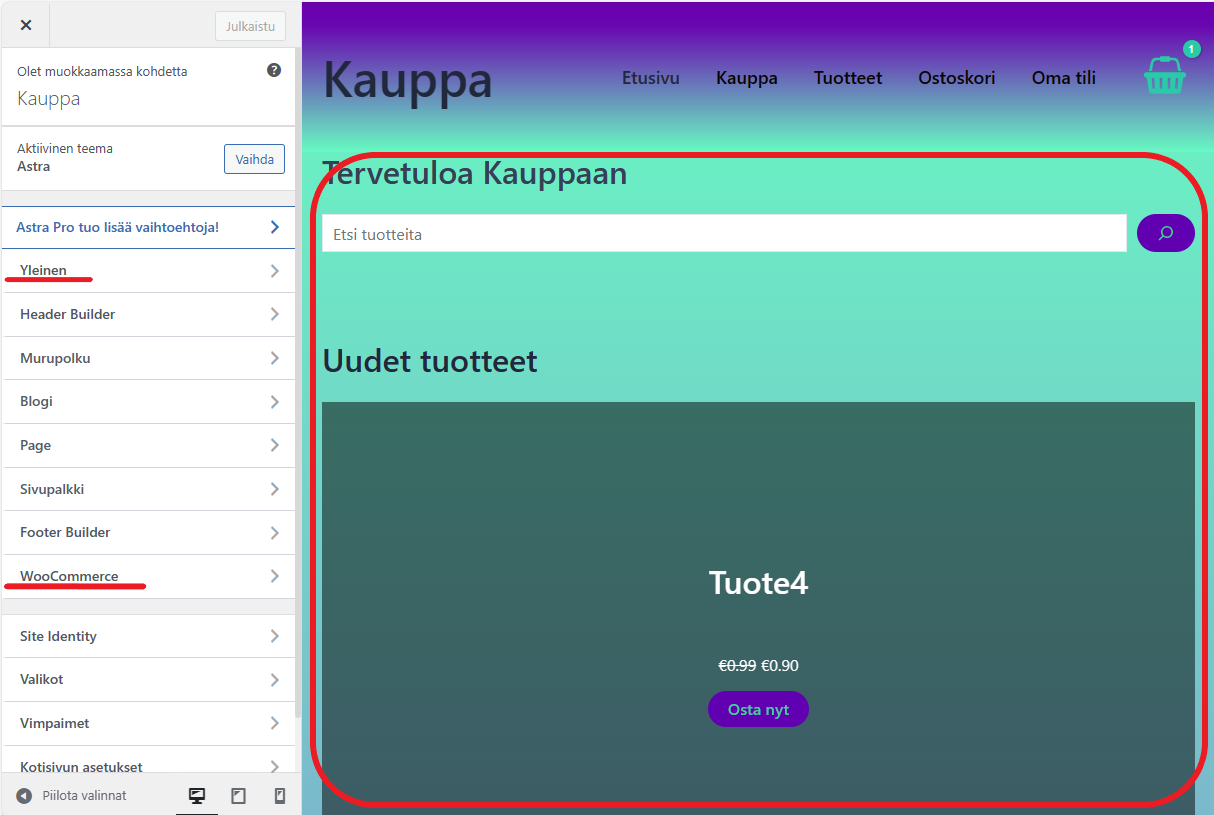

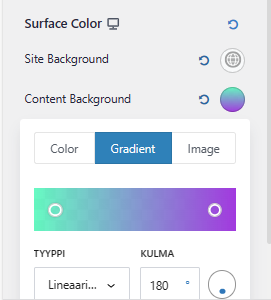
Bonus vinkki: Jos haluat monivärin kuten esimerkissä, etsi väri, jota haluat mukauttaa ja valitse "Gradient".
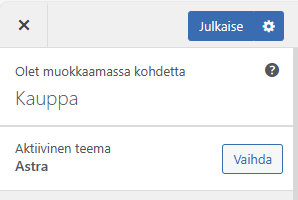
Kun olet muuttanut verkkokaupan ulkonäköä, muista tallentaa muutokset valitsemalla “Julkaise”.
Lisää sivuja ja sisältöä
Luo sivuja, kuten "Tietoja meistä", "Yhteystiedot" ja "Usein kysytyt kysymykset"
tarpeen mukaan.
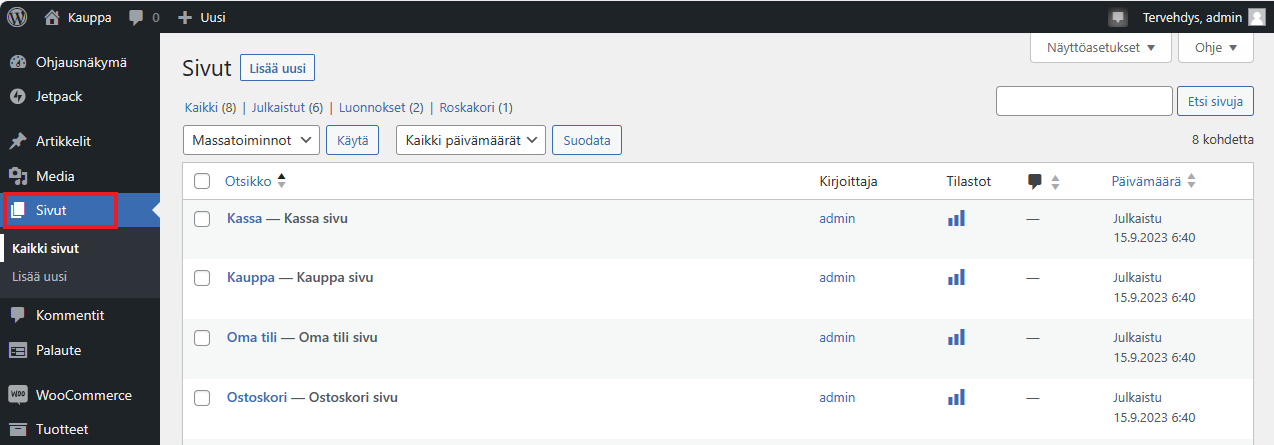
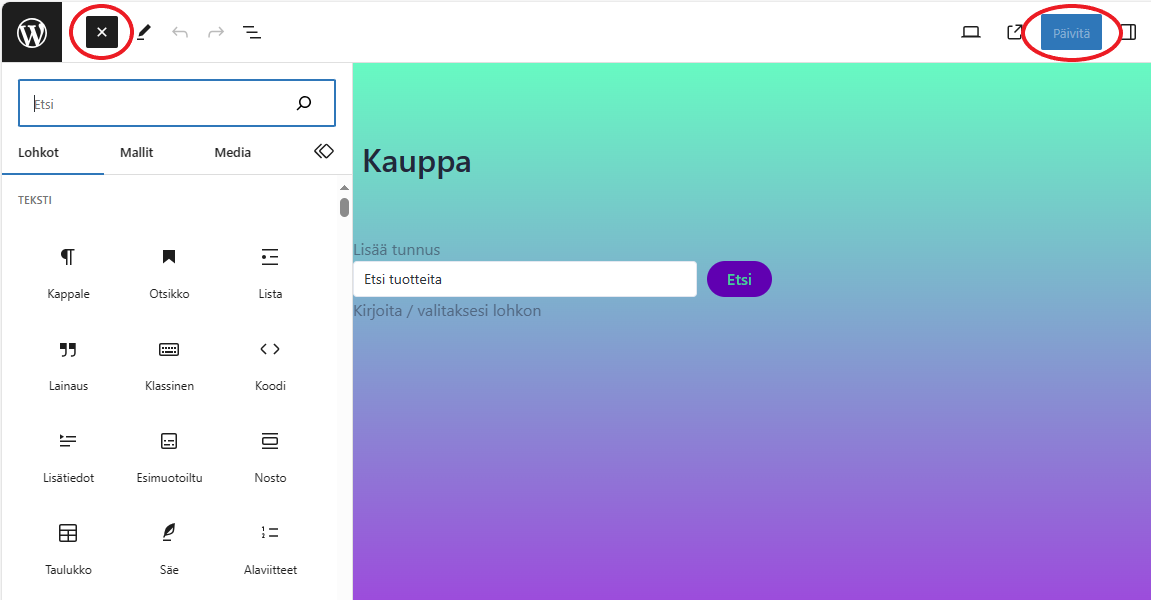
Siirry pääsivulla osioon “Sivut” ja klikkaa joko olemassa olevaa sivua muokataksesi sitä tai lisää uusi sivu.
Voit lisätä sivulle erilaisia sisältöjä, kuten otsikon, tekstiä, hakupainikkeen ja paljon muuta. Muista tallentaa klikkaamalla “Päivitä”.
Testaa ja julkaise
Ennen kuin julkaiset verkkokaupan, testaa se perusteellisesti varmistaaksesi, että
kaikki toimii moitteettomasti.
Kun olet tyytyväinen, avaa verkkokauppa yleisölle.
Muistathan, että verkkokaupan ylläpito vaatii jatkuvaa huomiota. Seuraa
varastotilannetta, päivitä tuotteita ja pidä huolta tietoturvasta ja
asiakastuesta. Voit halutessasi ladata WordPressissä laajennuksia ja lisäosia, jotka voivat auttaa
sinua hallitsemaan ja kasvattamaan verkkokauppaa.

